DNAC - NIC Bonding
Table of Contents
If you are looking to configure NIC bonding for DNAC, this post will show the currently available options for the DN2-HW-APL appliance running DNAC version 2.2.2.6 and newer. Only 10G interfaces are addressed for NIC bonding in this post. If you want to play with 1G interface NIC bonding, have a look at the official documentation
NOTE! NIC bonding is not supported for the DN1-HW-APL (1st gen DNAC appliance). An apparent reason for this is that the DN1 appliance only comes with a single NIC adapter with two 10G interfaces. Cisco wants the NIC bonding to be configured on two different physical NIC adapters.
The configuration of the NIC Bond happens in the Maglev Configuration Wizard. Here is how you start the Maglev Configuration Wizard:
sudo maglev-config update
Prerequisites
Oftentimes DNAC does not have the Intel X710-DA4 NIC enabled. This must be done first. Usually only the PCIe Slot 2 Link Speed must be changed from Disabled to Auto, but check these two values in CIMC:
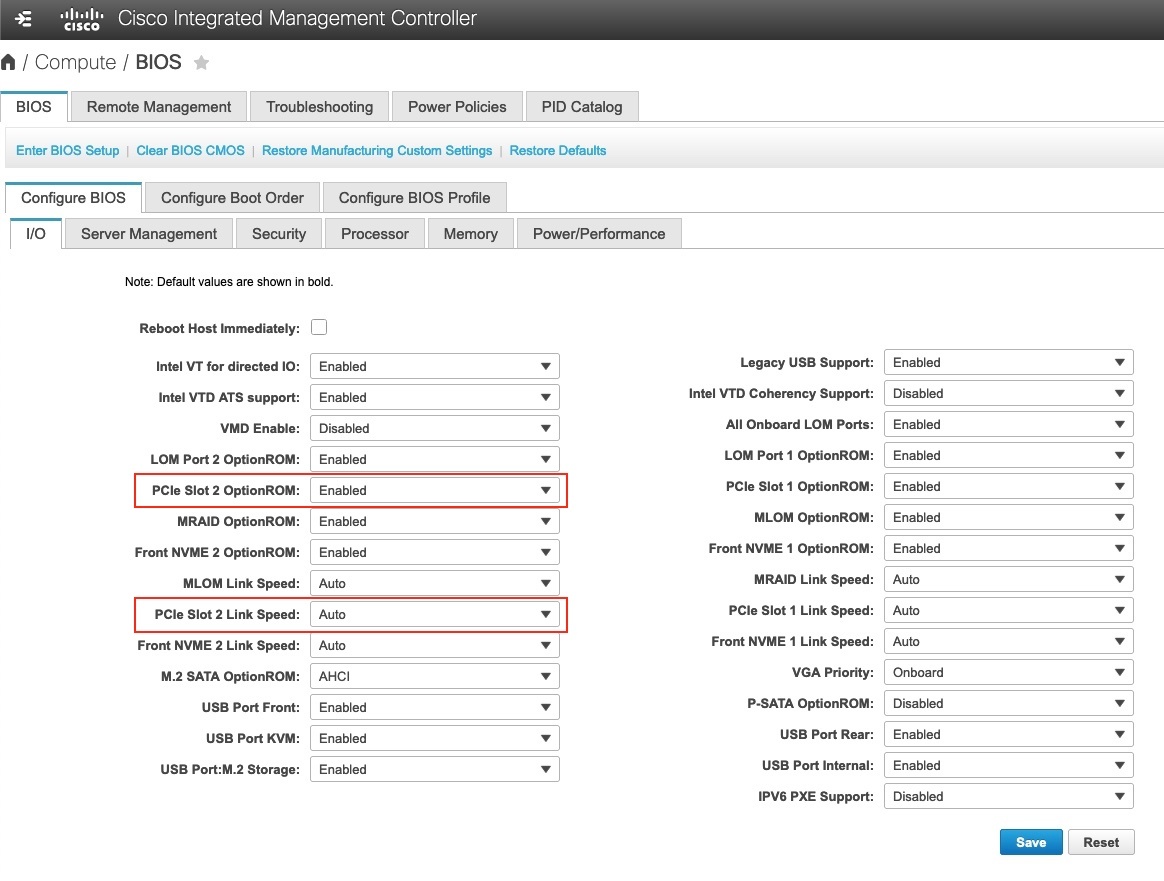
Remember to reboot the server after changing these values in CIMC.
DNAC Interfaces
Working with DNAC interfaces can be confusing. Below table provides a summary of the interfaces of DNAC and its name in the OS for each NIC along with the physical interface connector type.

| Interface | Intel X710-DA2 | Intel X710-DA4 | Interface Type |
|---|---|---|---|
| Enterprise | enp94s0f0 (15) | enp216s0f2 (12) | SFP+ |
| Cluster | enp94s0f1 (14) | enp216s0f3 (13) | SFP+ |
| Management | eno1 (3) | enp216s0f0 (10) | RJ-45 |
| Internet | eno2 (4) | enp216s0f1 (11) | RJ-45 |
The CIMC port is labeled (6).
In reality when you cable DNAC you only need the Enterprise and Cluster interfaces. Of course you’ll also want to configure and patch the CIMC.
With these DNAC interface mapping in place, it should be fairly easy to patch the server.
Greenfield NIC Bonding
If this is a new install you can deploy NIC bonding using just two 10G interfaces from each DNAC using VLAN over LACP like this:
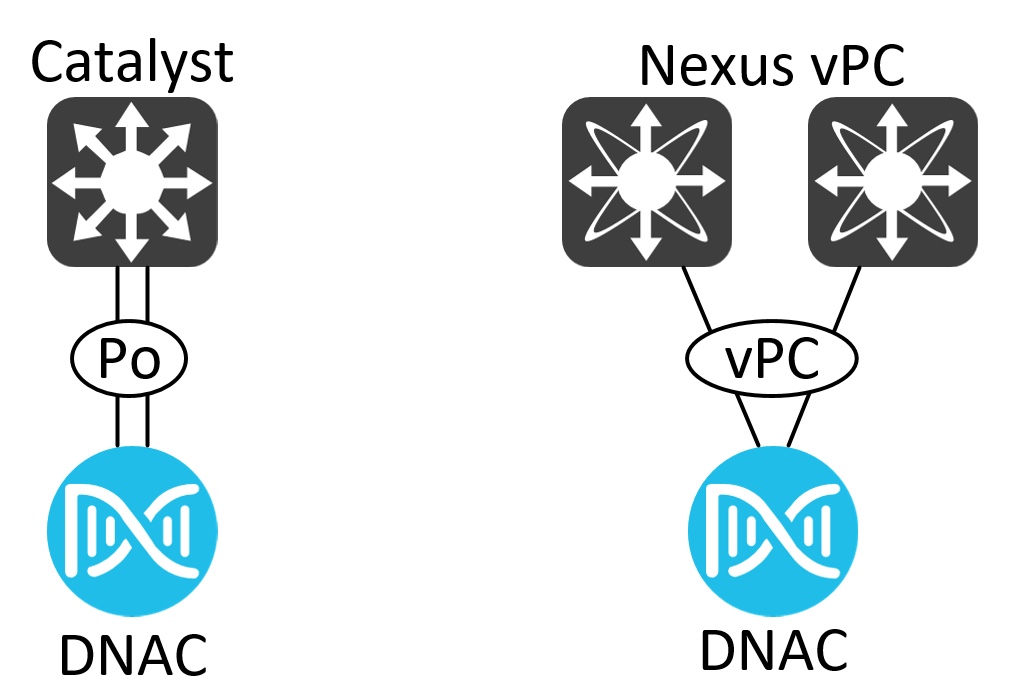
This is great and what network people are used to do with many Cisco products.
The switch ports you connect DNAC to should be pre-configured for LACP. Here is an example for a Catalyst switch configured for VLAN over LACP NIC bonding:
interface Port-channel1
description DNAC01 NIC Bond
switchport trunk allowed vlan 2000,2001
switchport mode trunk
spanning-tree portfast edge trunk
!
interface TwentyFiveGigE1/0/1
 description DNAC01 - Enterprise (enp94s0f0)
 switchport trunk allowed vlan 2000,2001
 switchport mode trunk
 channel-group 1 mode active
 spanning-tree portfast edge
 lacp rate fast
 !
 interface TwentyFiveGigE1/0/2
 description DNAC01 - Enterprise (enp216s0f2)
 switchport trunk allowed vlan 2000,2001
 switchport mode trunk
 channel-group 1 mode active
 spanning-tree portfast edge
 lacp rate fast
Ensure you have LACP fast rate configured.
Unfortunately you cannot configure which interfaces are used in the NIC bond. DNAC will use the two Enterprise interfaces for the bond when configuring VLAN over LACP. This cannot be changed.
Here is how you configure NIC bonding in the Maglev Configuration Wizard:
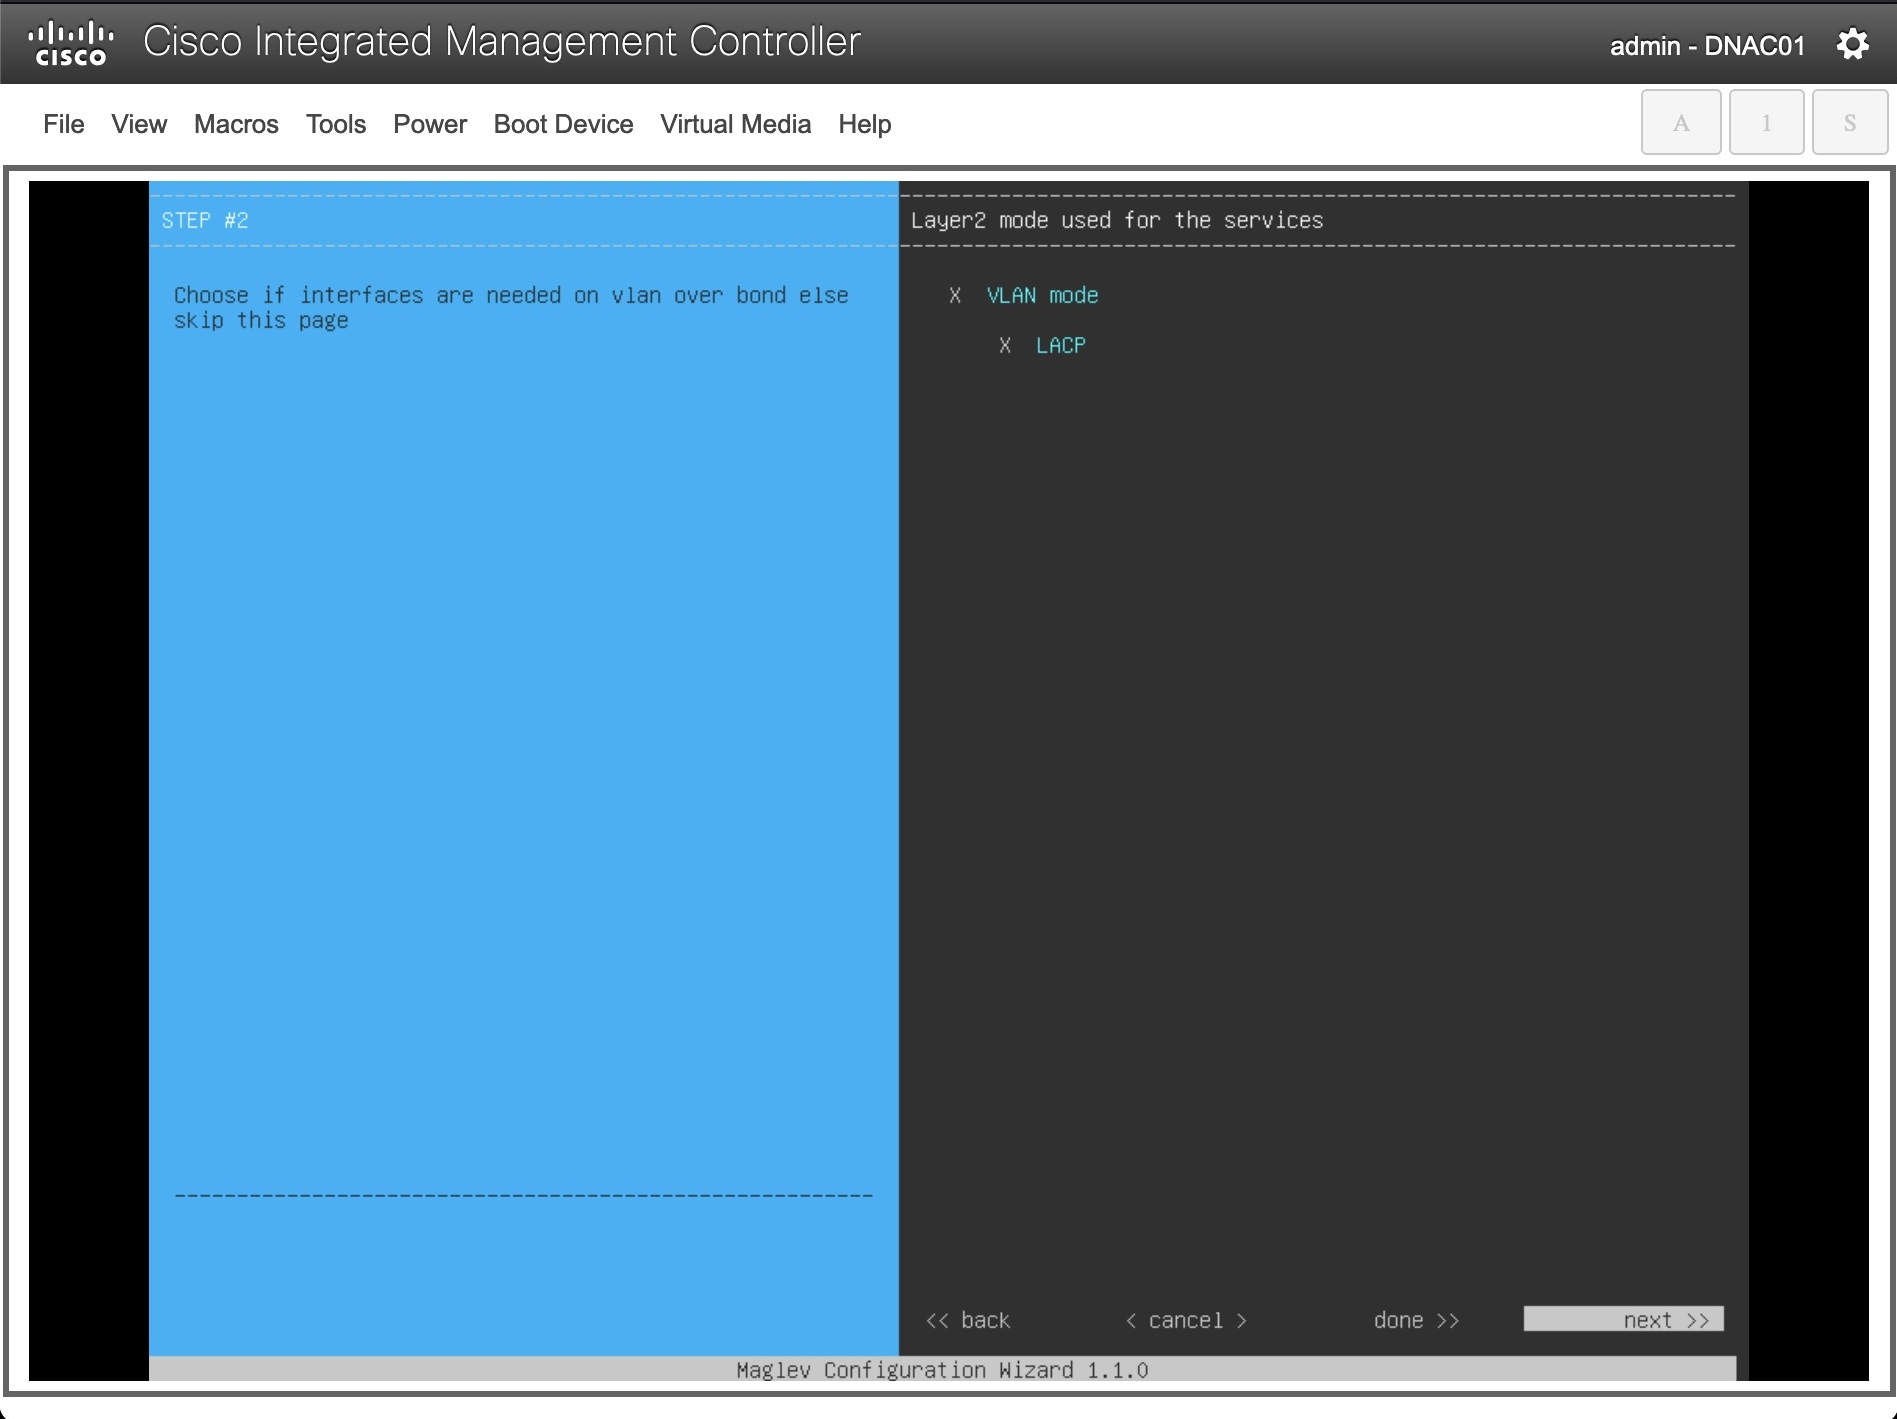
Now you can configure the Enterprise interface and add a VLAN tag:
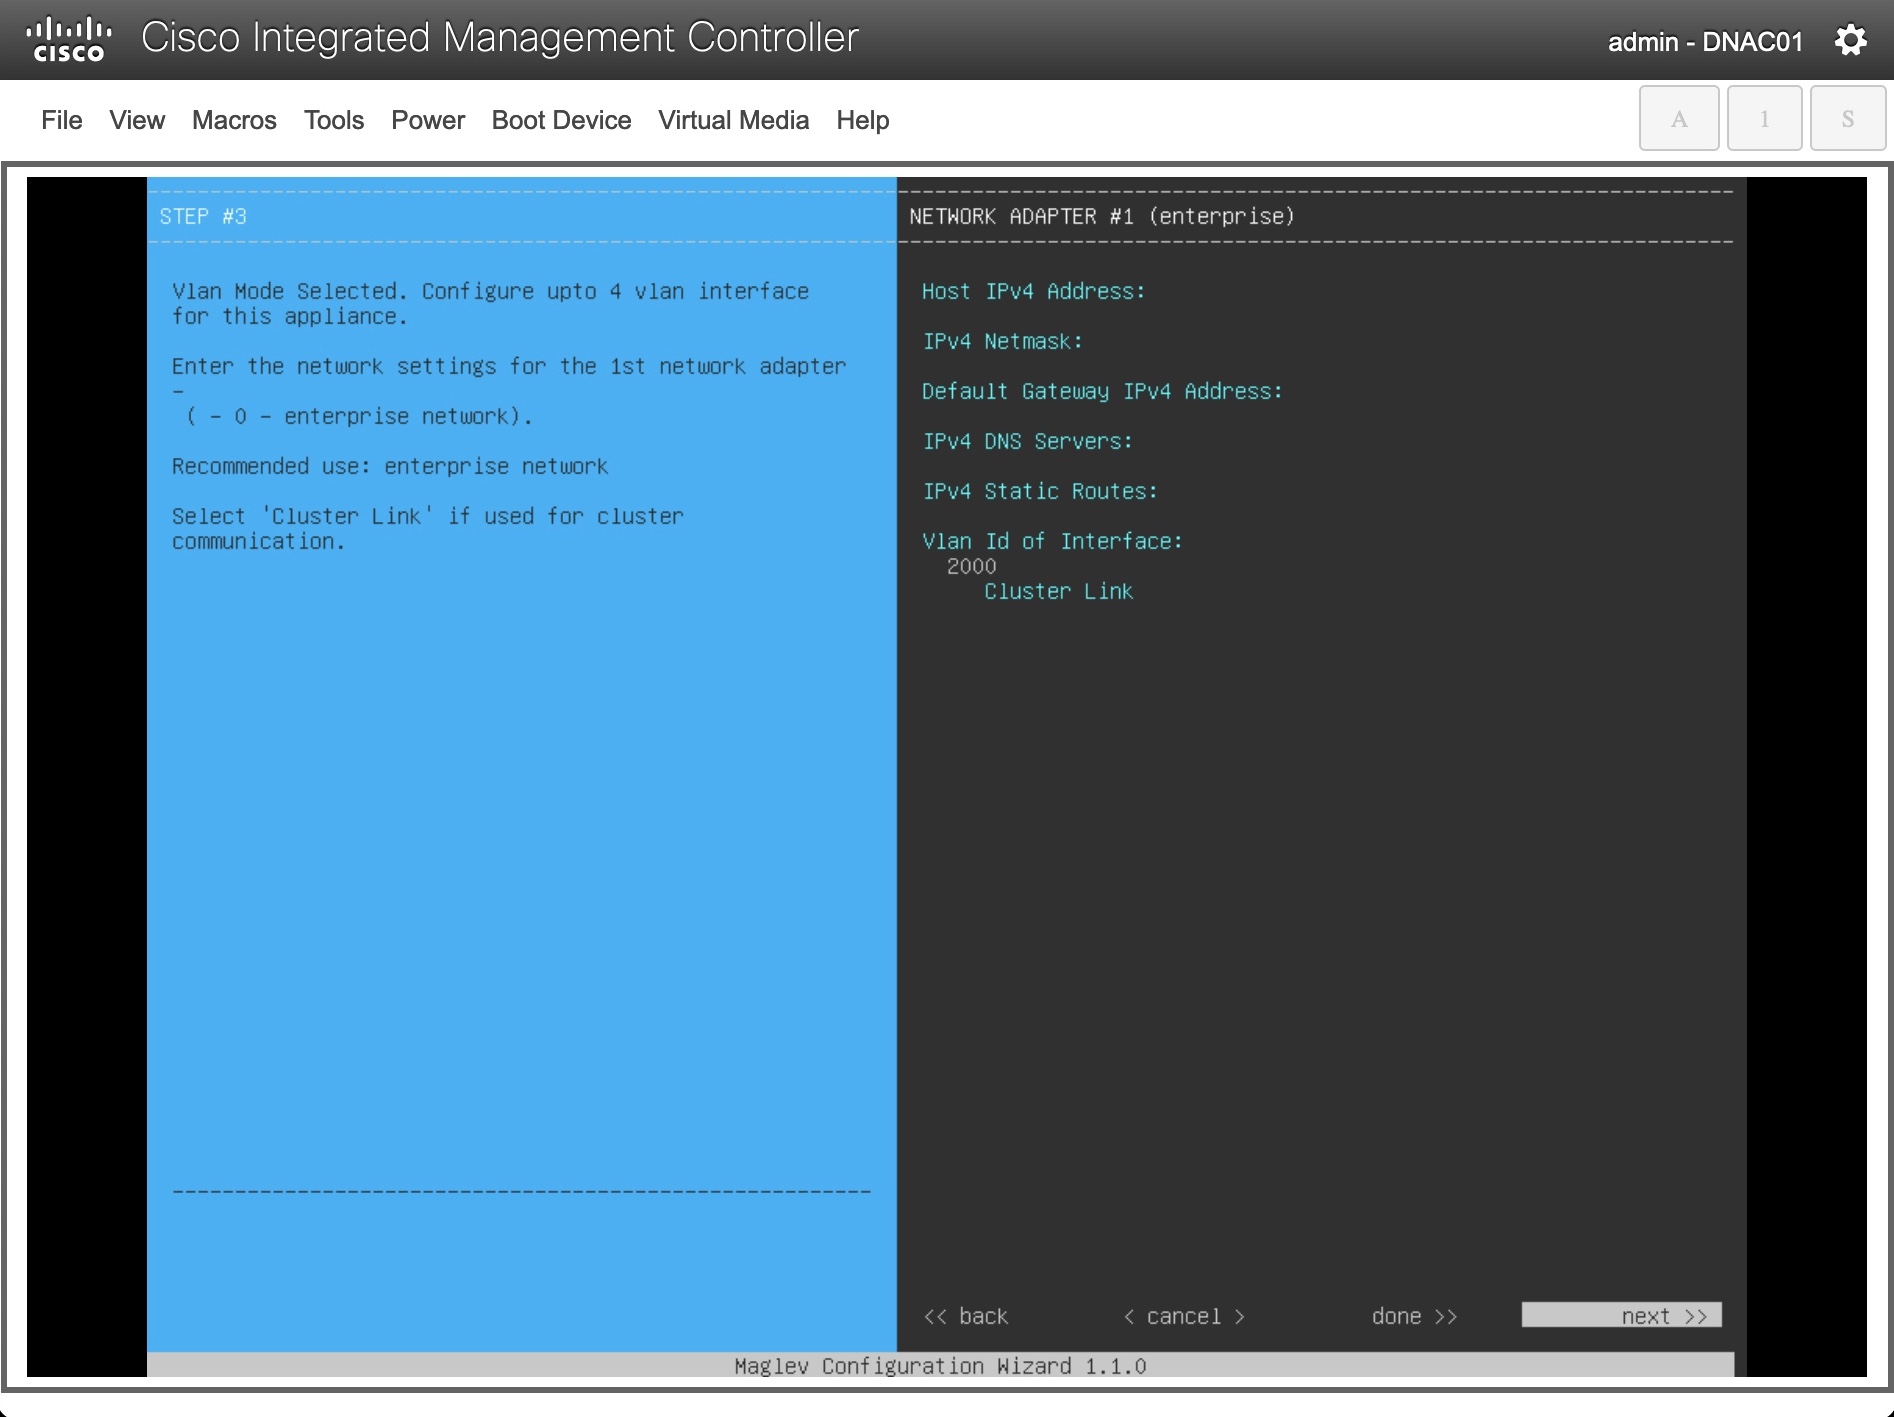
And the same for the cluster interface:
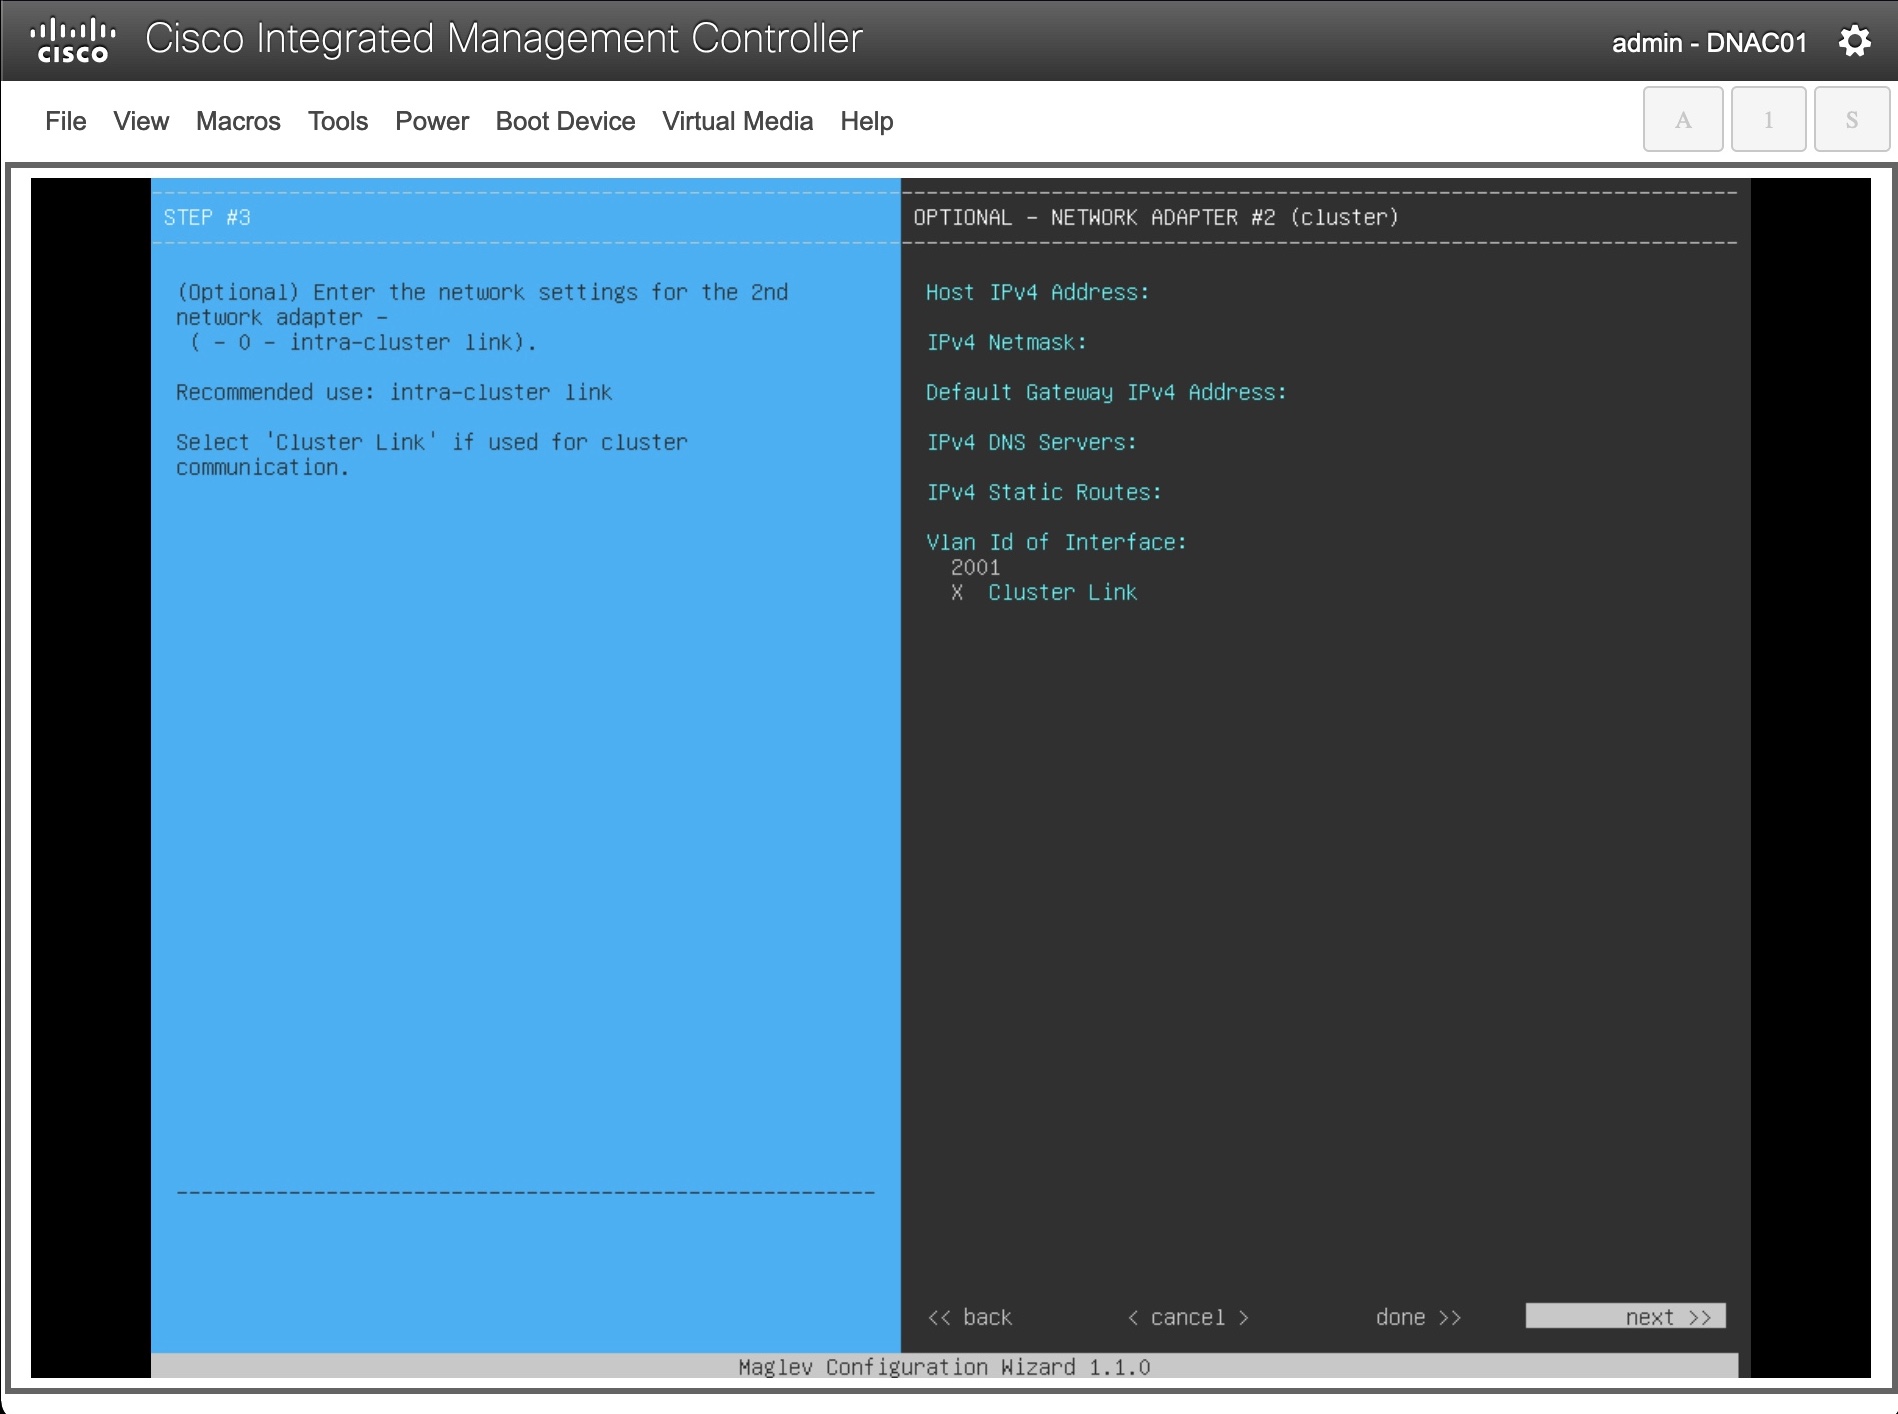
I removed IP addresses, but obviously you’ll need to enter relevant addressing, too.
Brownfield NIC Bonding
When you already have DNAC implemented with a single Enterprise and Cluster interface, your only option is to add two more links. These will be enp216s0f2 (12) for the extra Enterprise interface, and the enp216s0f3 (13) for the extra Cluster interface. There is no way to achieve VLAN over LACP for brownfield deployments. If you try, you’ll get these errors:
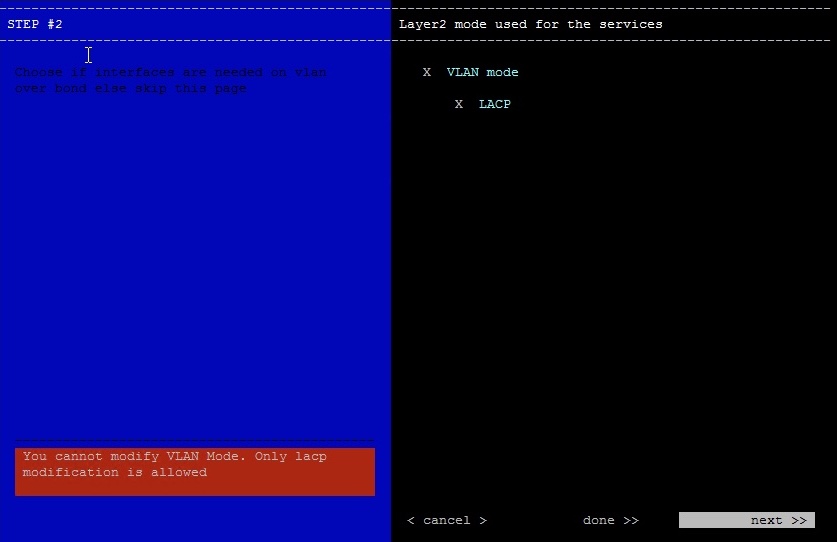
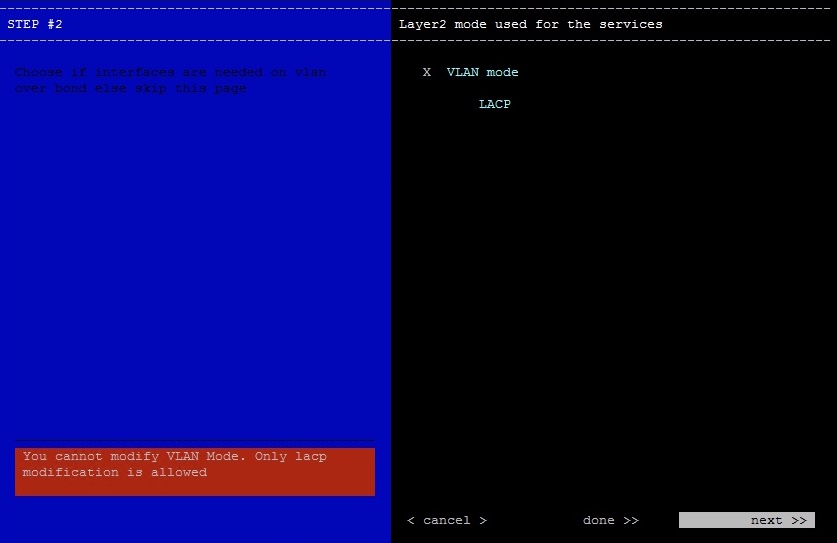
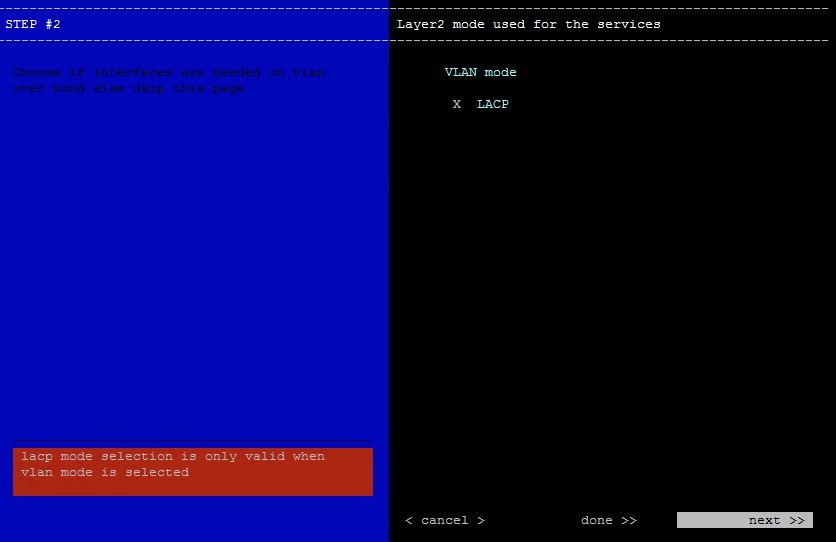
NOTE! You must run the Maglev Configuration Wizard from the CIMC console. if you try to configure NIC Bonding using SSH, you’ll receive this lovely error (after you run through the wizard!):
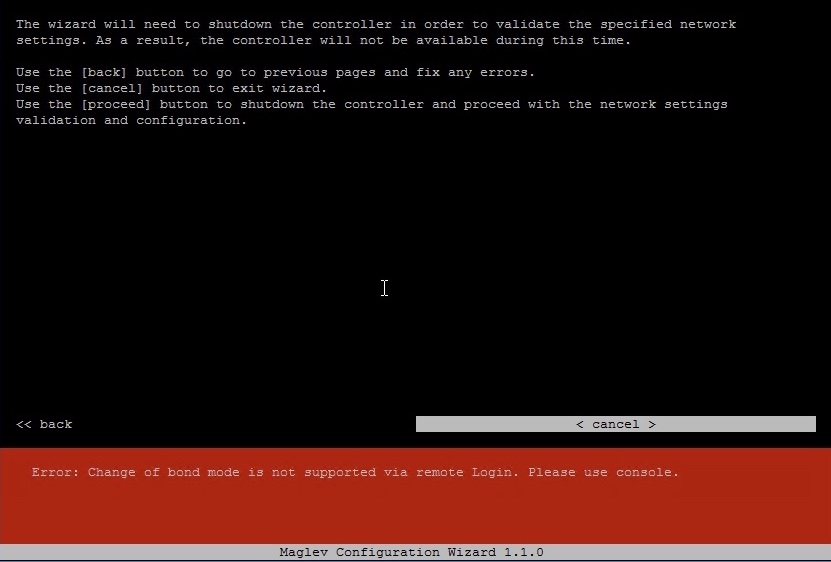
If you have assurance backup configured, you might also get this error:
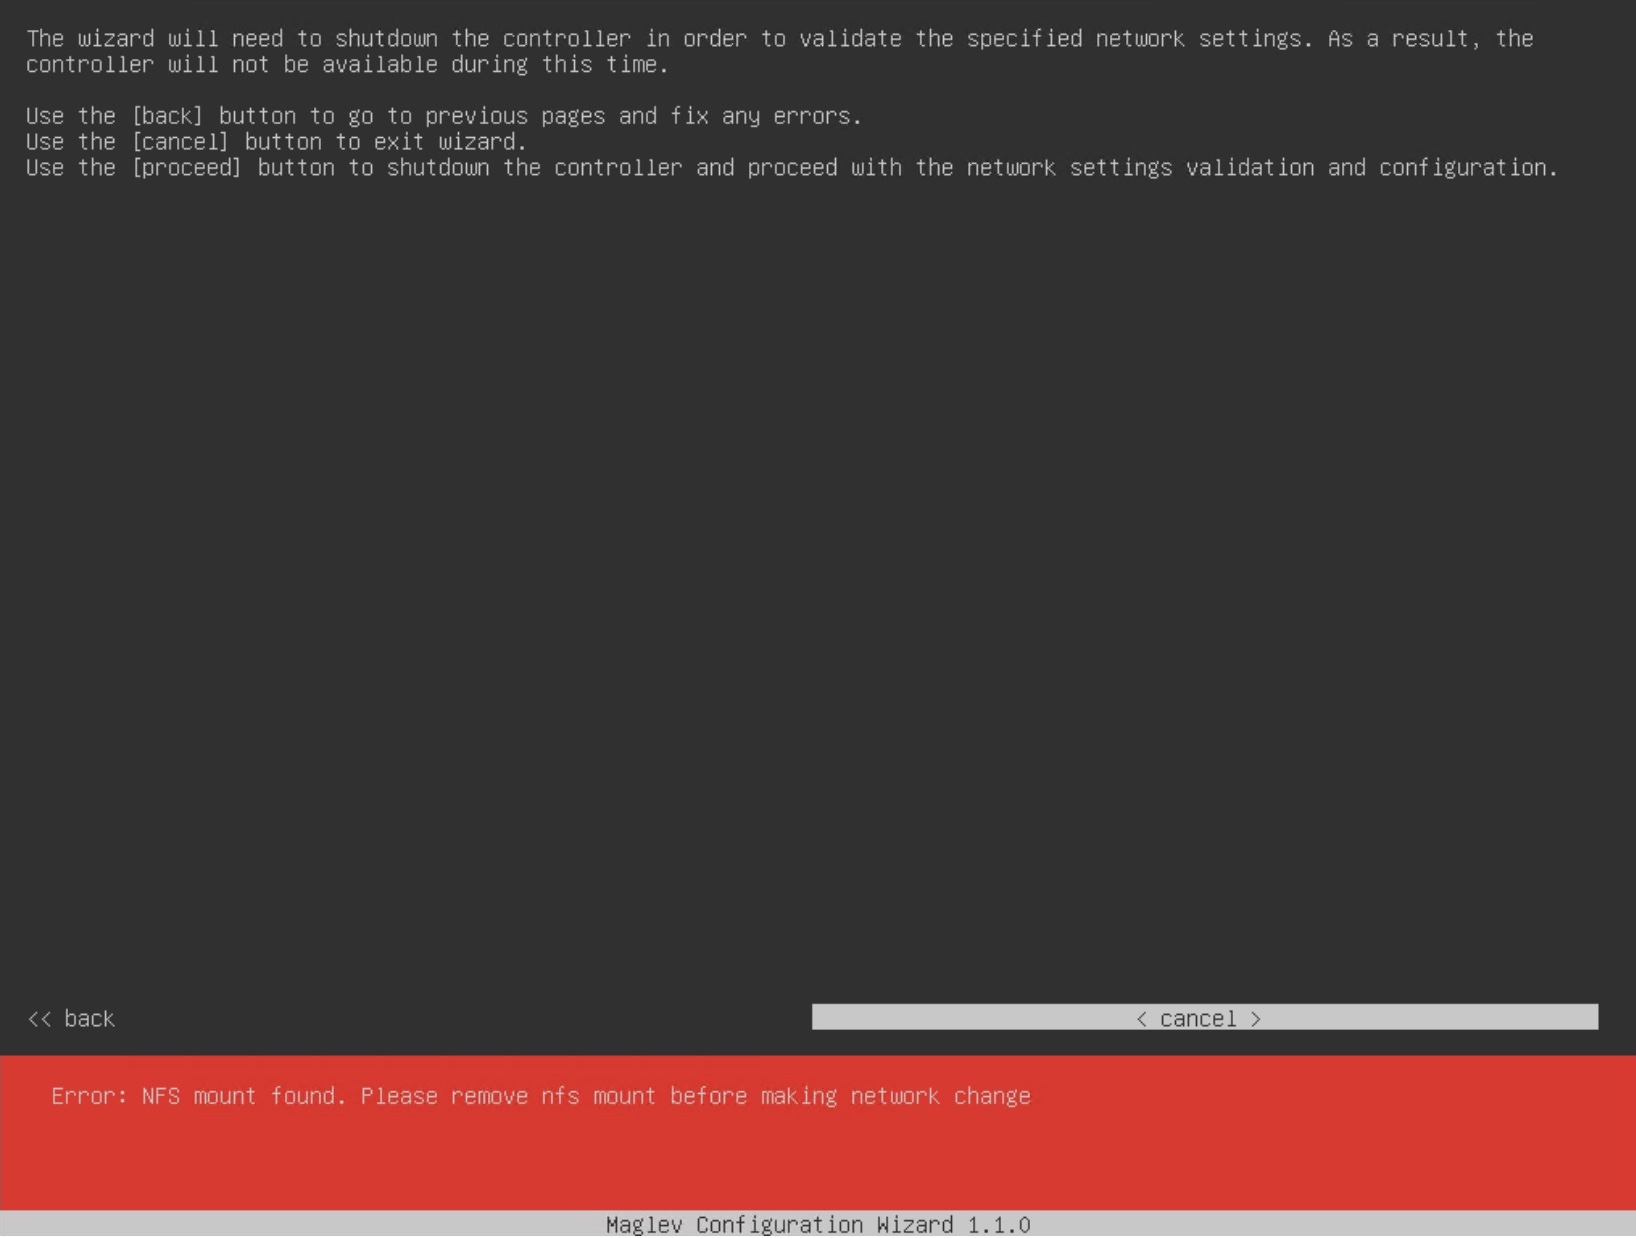
The fix is to remove the NFS server in backup and to do this you must remove any backup schedule first:

Remember to configure assurance backup after you configure NIC bonding!
Your only option is this:
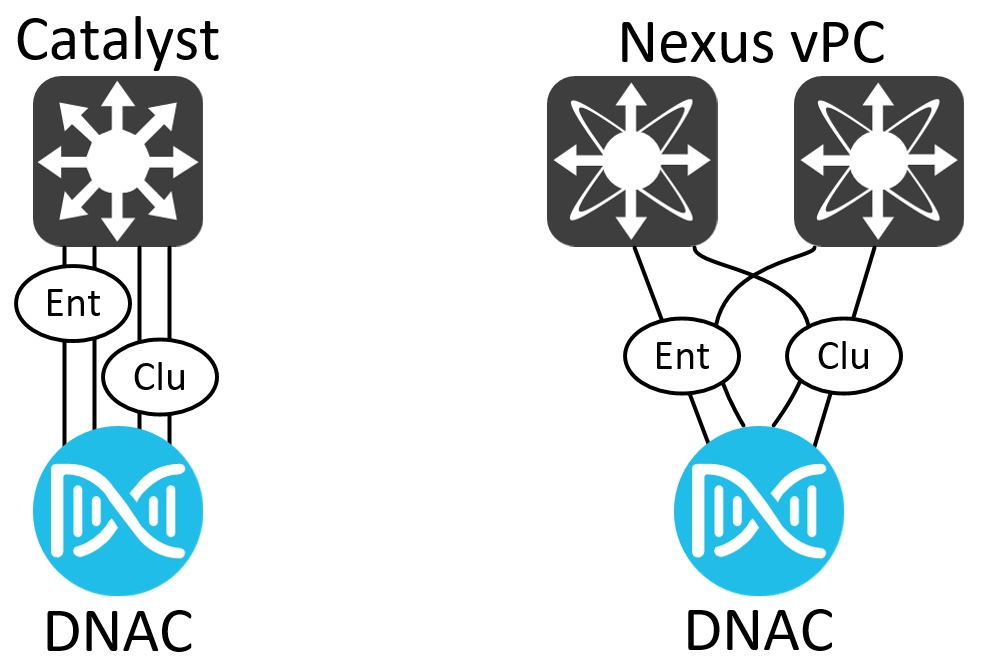
The switch ports you connect DNAC to should be pre-configured for LACP. Here is an example for a Catalyst switch configured for VLAN over LACP NIC bonding:
interface Port-channel1
description DNAC01 NIC Bond - Enterprise
switchport mode access
switchport access vlan 2000
spanning-tree portfast
!
interface TwentyFiveGigE1/0/1
 description DNAC01 - Enterprise (enp94s0f0)
 switchport mode access
 switchport access vlan 2000
 channel-group 1 mode active
 spanning-tree portfast
 lacp rate fast
 !
 interface TwentyFiveGigE1/0/2
 description DNAC01 - Enterprise (enp216s0f2)
 switchport mode access
 switchport access vlan 2000
 channel-group 1 mode active
 spanning-tree portfast
 lacp rate fast
 !
 interface Port-channel2
 description DNAC01 NIC Bond - Cluster
 switchport mode access
 switchport access vlan 2001
 spanning-tree portfast
 !
 interface TwentyFiveGigE1/0/3
  description DNAC01 - Cluster (enp94s0f1)
  switchport mode access
  switchport access vlan 2001
  channel-group 2 mode active
  spanning-tree portfast
  lacp rate fast
  !
  interface TwentyFiveGigE1/0/4
  description DNAC01 - Cluster (enp216s0f3)
  switchport mode access
  switchport access vlan 2001
  channel-group 2 mode active
  spanning-tree portfast
  lacp rate fast
Ensure you have LACP fast rate configured.
Here is how it looks in the Maglev Configuration Wizard: (you’ll have your DNAC’s IPs listed)
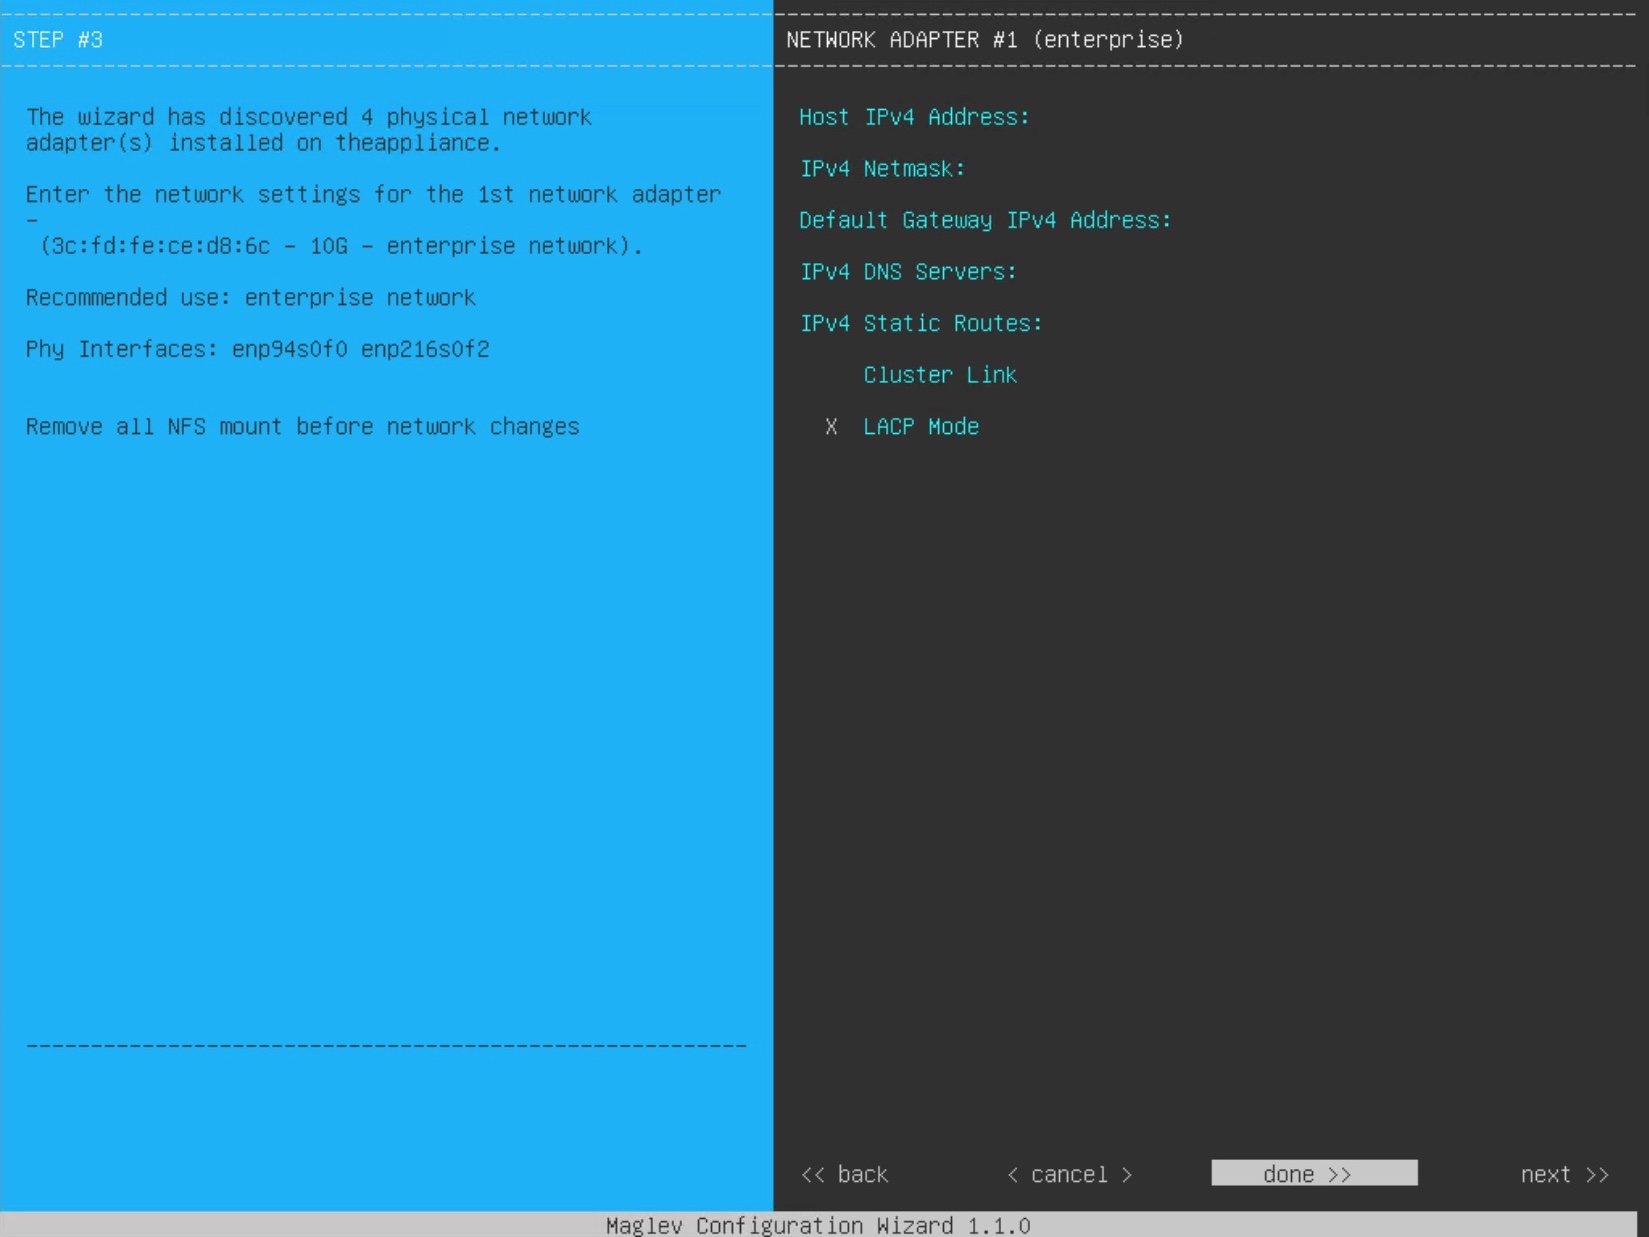
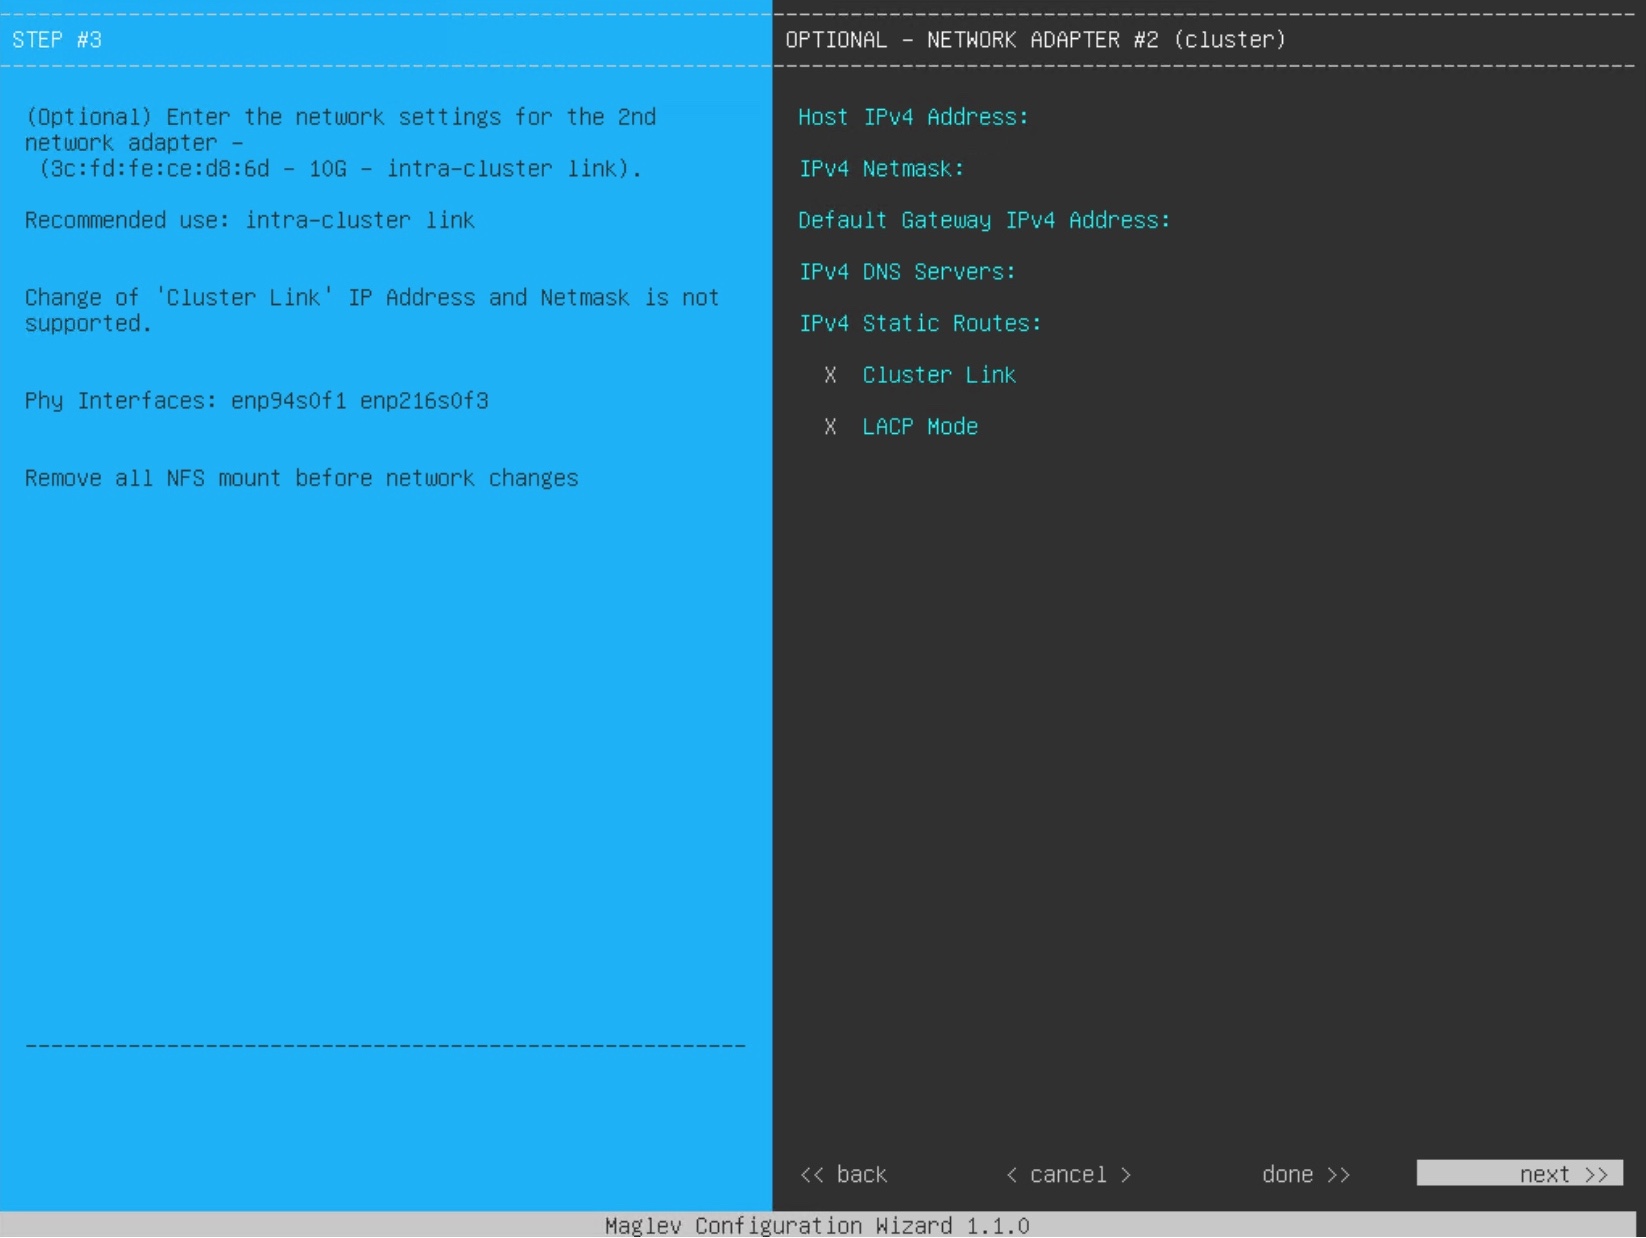
Now LACP has been configured!
Verification
Unfortunately DNAC doesn’t offer any details in the GUI for interfaces. You might want to check out how the network configuration looks in DNAC CLI afterwards:
etcdctl get $(etcdctl ls /maglev/config/ | grep -i node | head -1)/network | jq
Here is a sample output:
$ etcdctl get $(etcdctl ls /maglev/config/ | grep -i node | head -1)/network | jq
[
  {
    "interface": "enterprise",
    "intra_cluster_link": false,
    "inet6": {
      "netmask": "",
      "host_ip": ""
    },
    "inet": {
      "dns_servers": [
        "8.8.8.8"
      ],
      "host_ip": "1.1.1.1.1",
      "netmask": "255.255.255.255",
      "routes": [],
      "gateway": "1.1.1.1",
      "vlan_id": "2000"
    }
  },
  {
    "interface": "cluster",
    "intra_cluster_link": true,
    "inet6": {
      "netmask": "",
      "host_ip": ""
    },
    "inet": {
      "dns_servers": [],
      "host_ip": "2.2.2.2",
      "netmask": "255.255.255.255",
      "routes": [],
      "gateway": "",
      "vlan_id": "2001"
    }
  },
  {
    "interface": "management",
    "intra_cluster_link": false,
    "inet6": {
      "netmask": "",
      "host_ip": ""
    },
    "inet": {
      "dns_servers": [],
      "host_ip": "",
      "netmask": "",
      "routes": [],
      "gateway": "",
      "vlan_id": ""
    }
  },
  {
    "interface": "internet",
    "intra_cluster_link": false,
    "inet6": {
      "netmask": "",
      "host_ip": ""
    },
    "inet": {
      "dns_servers": [],
      "host_ip": "",
      "netmask": "",
      "routes": [],
      "gateway": "",
      "vlan_id": ""
    }
  },
  {
    "interface": "bond0",
    "lacp_mode": true,
    "slave": [
      "enp94s0f0",
      "enp216s0f2"
    ],
    "inet6": {
      "netmask": "",
      "host_ip": ""
    },
    "inet": {
      "netmask": "",
      "host_ip": ""
    }
  }
]
Conclusion
NIC bonding with DNAC is a great addition of providing some extra redundancy. Especially if you run a single node cluster. There are restrictions of what is possible depending on whether you are looking at a greenfield or brownfield DNAC deployment.
Here are the summarized options for NIC bonding with DNAC:
- Greenfield:
- The two enterprise NICs are used (enp94s0f0 and enp216s0f2)
- Brownfield:
- Besides the two existing NICs (one enterprise and one cluster), you add two more from the Intel X710-DA4 NIC adapter (enp216s0f2 (enterprise) and enp216s0f3 (cluter))
With the brownfield case, there is no way to configure VLAN over LACP, meaning there is a cost of adding the two extra interfaces per DNAC you have. You’ll end up with two NIC bonds, one for the enterprise interface and one for the cluster interface. Both are untagged.
I hope you found this post useful.
