Claude Desktop, MCP, and Cisco CML
Table of Contents
Recently I found a Cisco blog explaining how you can automate the creation of labs using AI, MCP, and Cisco CML. Though the blog post links to the components used to make it happen, it does not offer a “getting started guide” to make it work. In this post I will show you what I did in my environment to get it working.
Claude Desktop
Claude Desktop is an app you run on your computer. It allows you to use Claude AI assistant which gives you access to the underlaying LLM hosted in the cloud.
With Claude Desktop you can connect to the MCP server which is the element that actually interacts with Cisco CML.
MCP Server
The MCP (Model Context Protocol) server takes our intent from AI and translate it into technical configuration and make it happen. In other words: it implements our intent.
Cisco CML
Cisco Modeling Labs is a simulation software that allows you to run routers and switches in a closed environment for testing and learning.
Getting Started
Below is a quick’n dirty of what I did to make it fly. I will not show you how to get CML up and running as this is a matter of deploying an OVA and mounting the “refplat” ISO during the install guide.
NOTE! You must have python 3.12+ and the uv package and project manager installed.
uv installation
For MacOS:
curl -LsSf https://astral.sh/uv/install.sh | sh
For Windows:
powershell -ExecutionPolicy ByPass -c "irm https://astral.sh/uv/install.ps1 | iex"
Claude Desktop
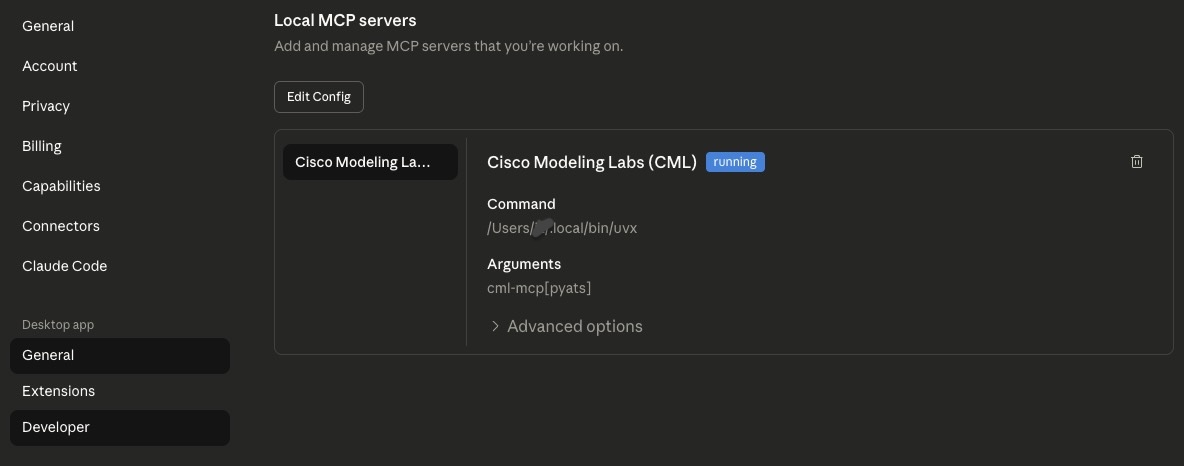
Download Claude Desktop and install it like any other app. After you create an account, go to the Developer settings of the app and create a config that contains this:
{
  "mcpServers": {
    "Cisco Modeling Labs (CML)": {
      "command": "<path_to_uvx_binary>", # I added /Users/<username>/.local/bin/uvx
      "args": [
        "cml-mcp[pyats]"
      ],
      "env": {
        "CML_URL": "https://<ip|hostname_of_your_cml>",
        "CML_USERNAME": "admin",
        "CML_PASSWORD": "<admin_password>"
      }
    }
  }
}
The configuration is stored in the file claude_desktop_config.json
That’s it!
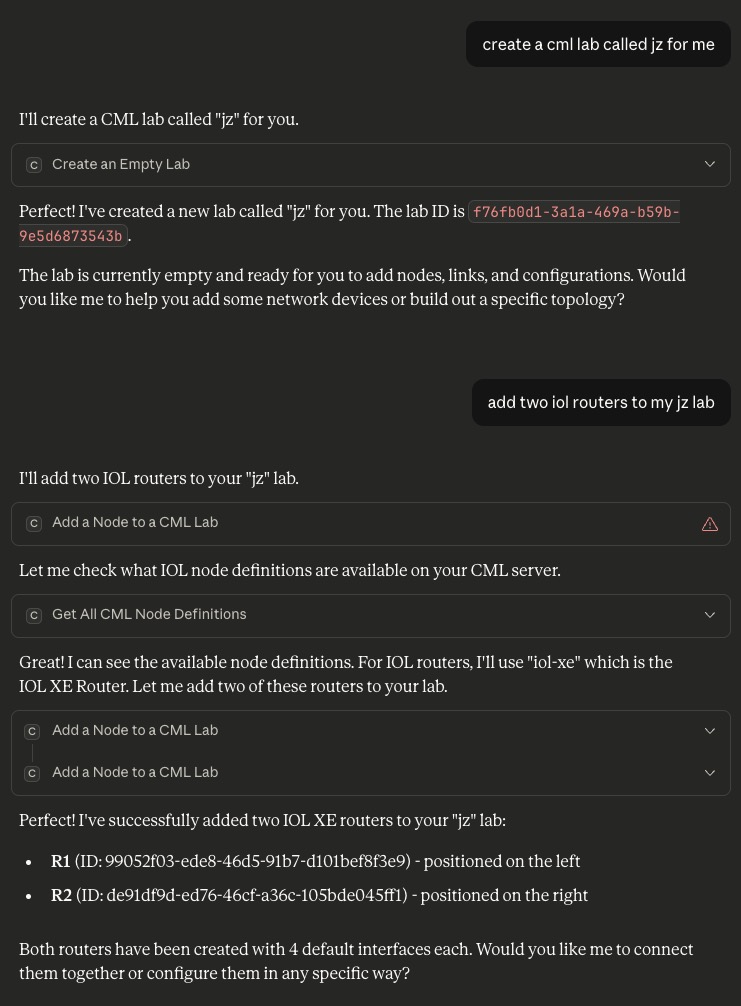
Now, you should be able to interact with CML using AI through MCP: