DNAC – External Authentication with ISE Radius
You probably want to use an existing Identity Store such as Active Directory when managing your network infrastructure – including DNAC. Below is a guide on how to configure this functionality.
When you enable external authentication in DNAC it will not exempt you from using the locally defined users on DNAC – at least not the built-in admin user.
DNAC External Authentication Configuration
Locate the “External Authentication� page in Settings -> System Settings -> Users
Here you define your ISE server IP address and the shared secret. Lastly you tick off the “Enable External User�. Do NOT modify the “AAA Attribute� default setting of “Cisco-AVPair�.
ISE Radius Configuration
I assume you already have ISE integrated with Active Directory. We must add the Active Directory group to ISE for use in the policy set later.
Go to Administration -> Identity Management -> External Identity Store -> AD (or whatever you called your Active Directory store) -> Groups
Here I have added a DNAC-Admins group: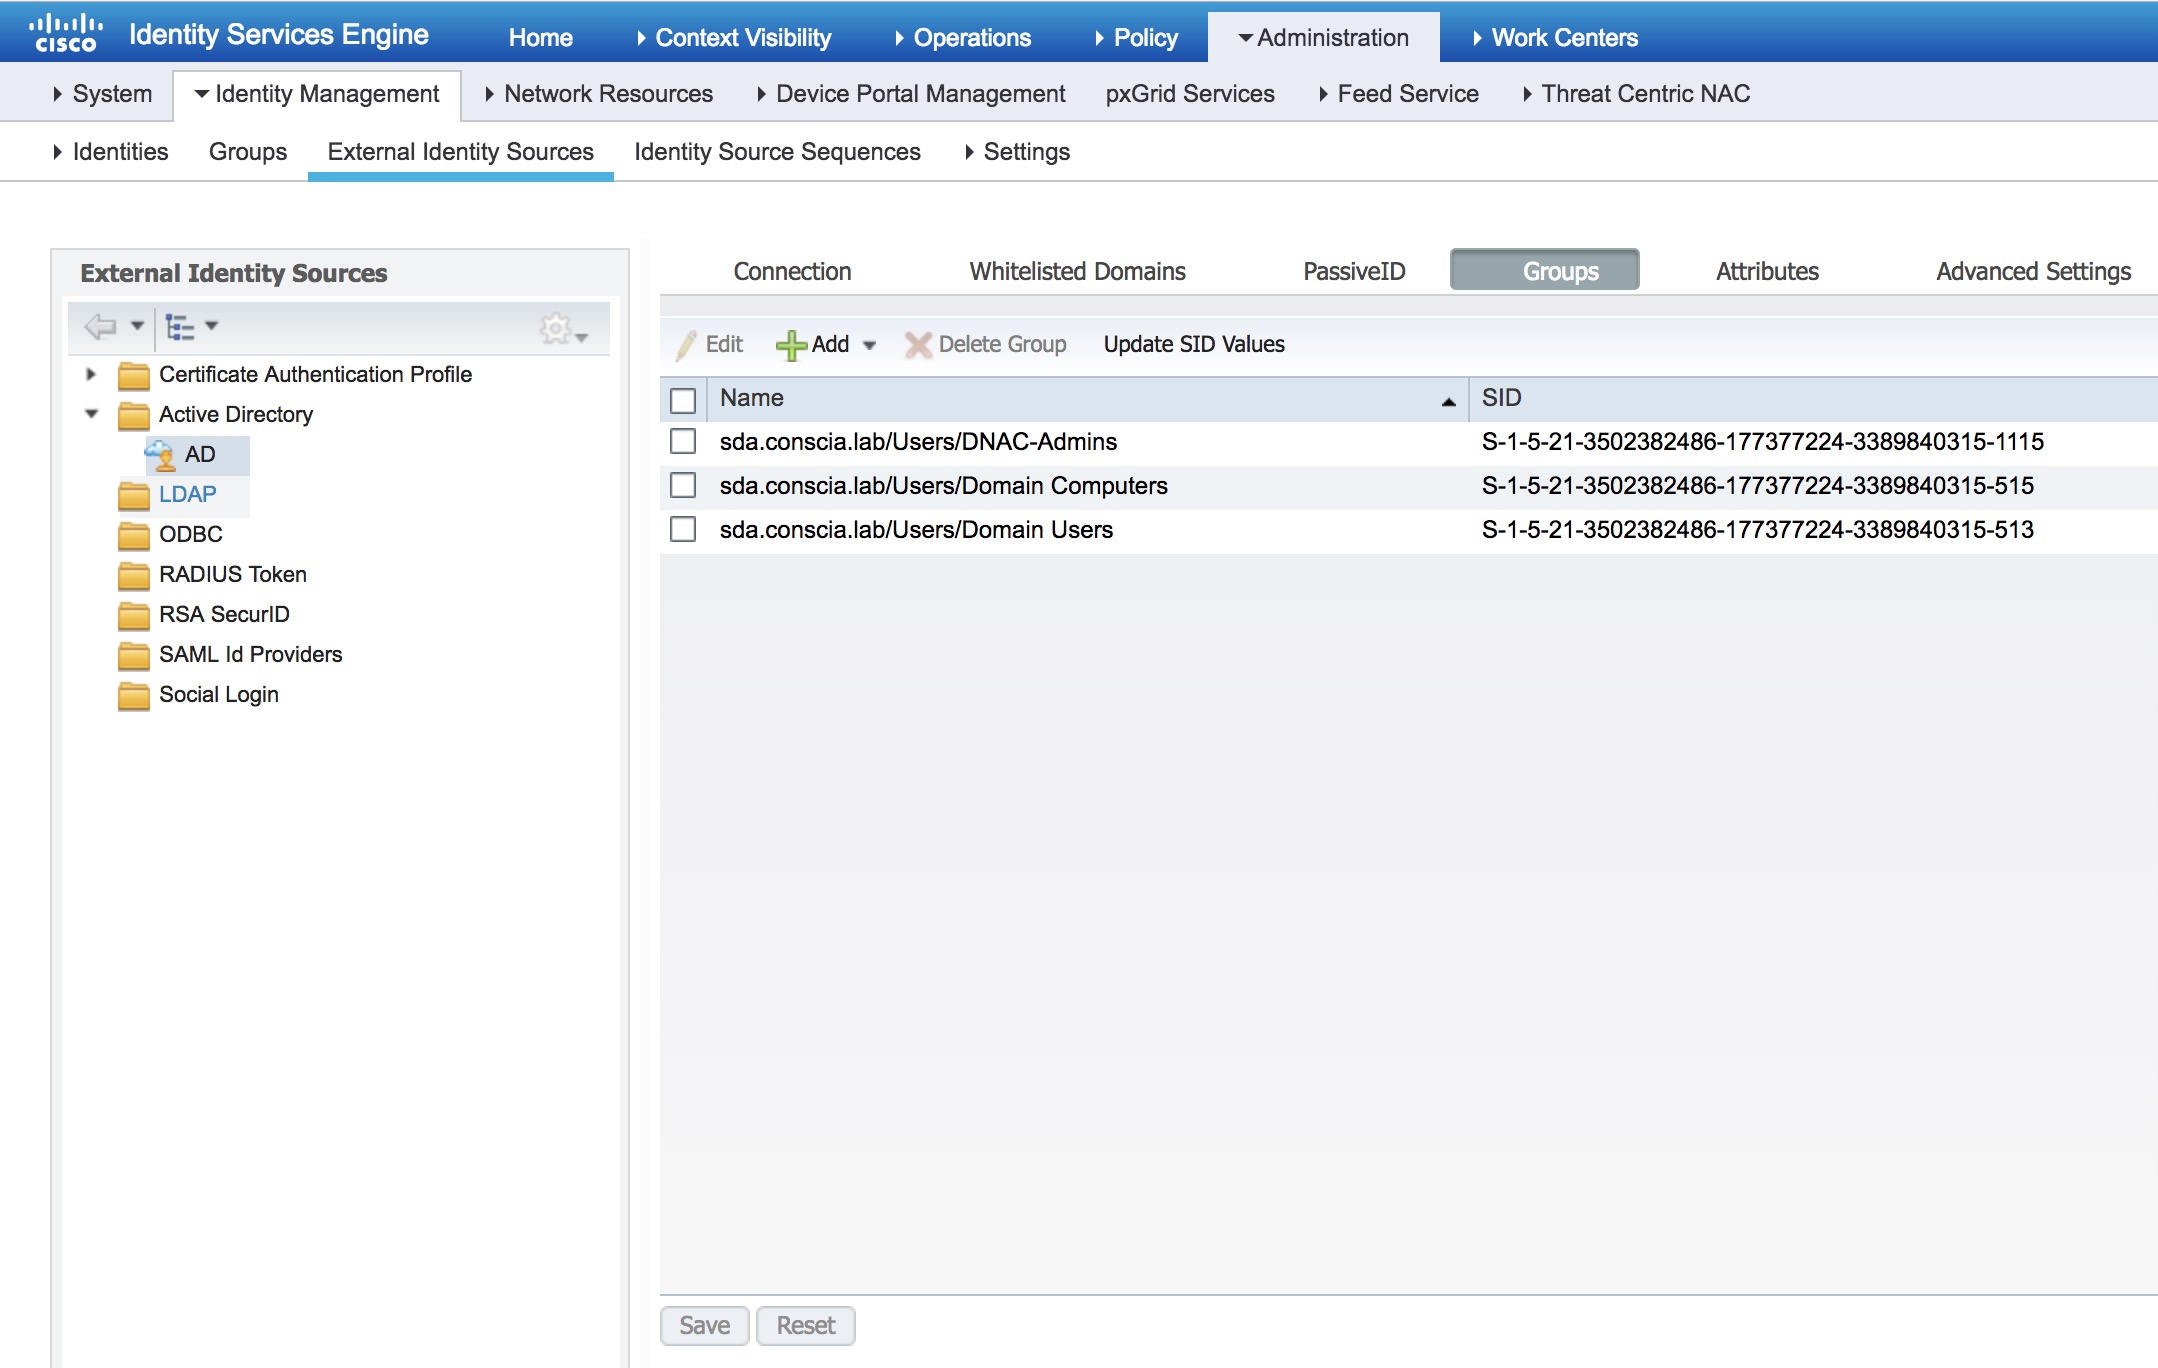
To configure ISE to let DNAC use it as a AAA server, you must first add DNAC Â as a Network Device in ISE.
Go to Administration -> Network Resources -> Network Devices
Here you add the DNAC by filling out the Name, IP address, Device Profile (Cisco), and Shared Secret: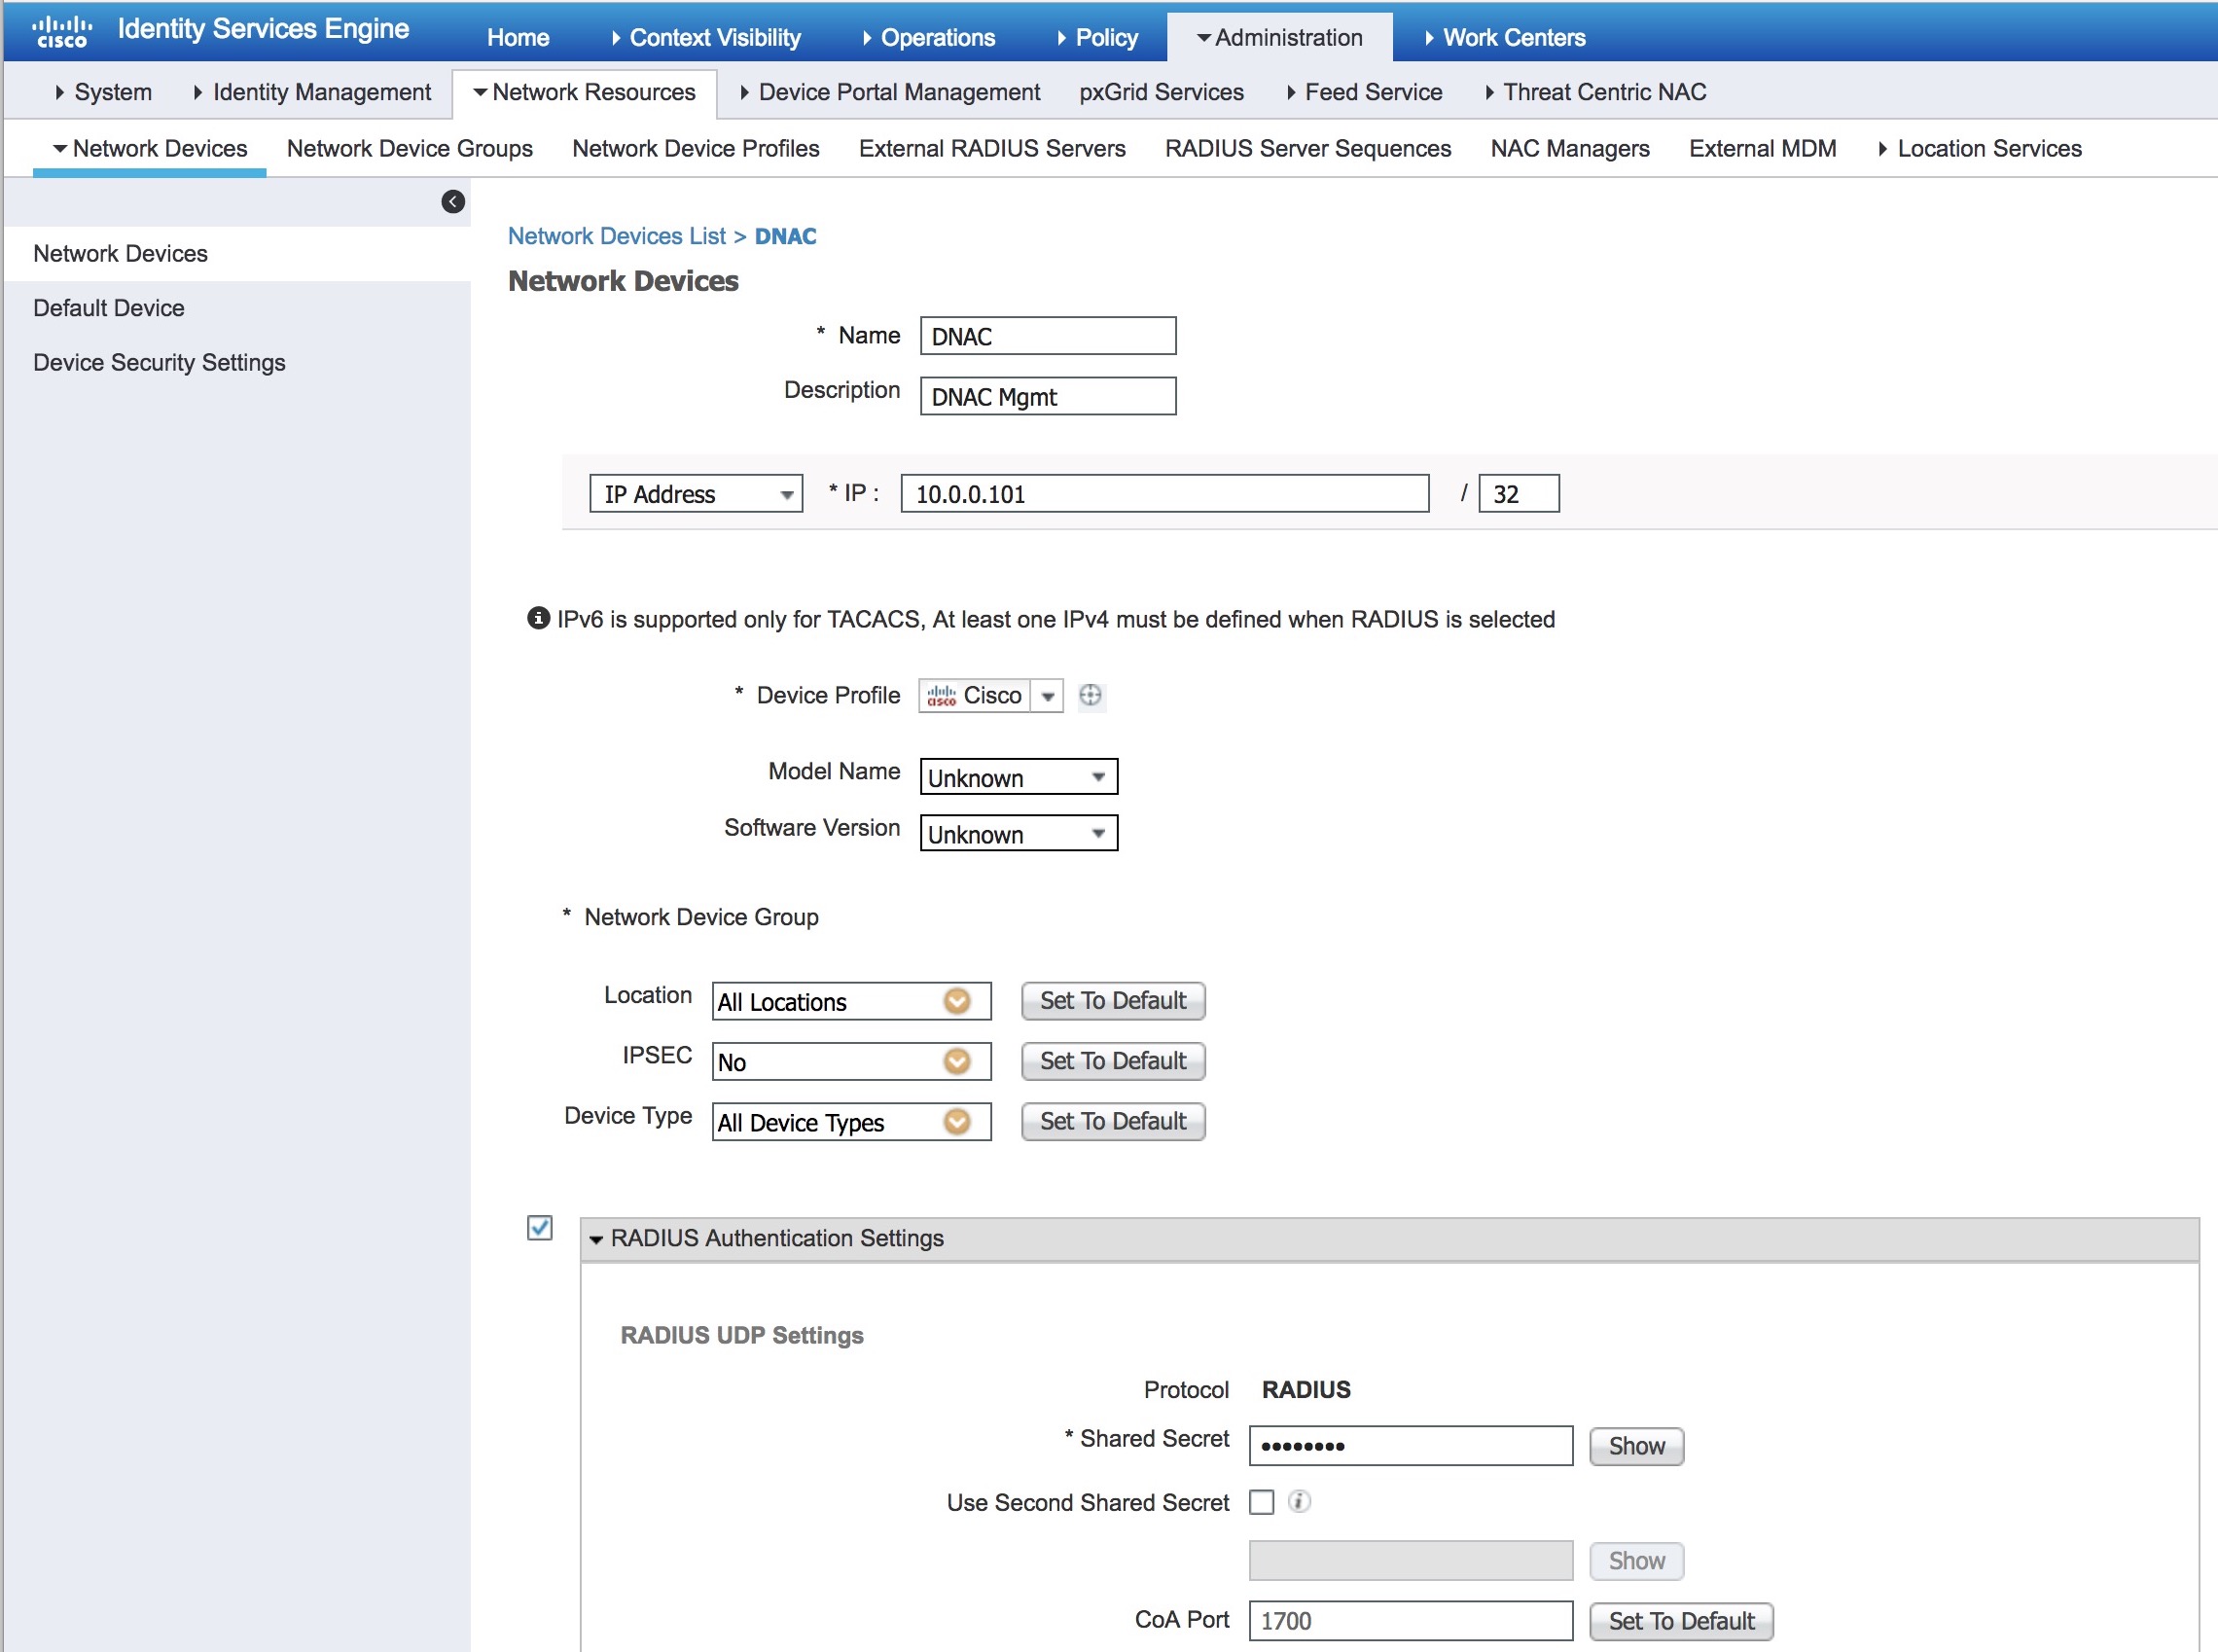
Next go to Policy -> Policy Elements -> Results -> Authentication -> Allowed Protocols
Add a new Allowed Protocol Service like this: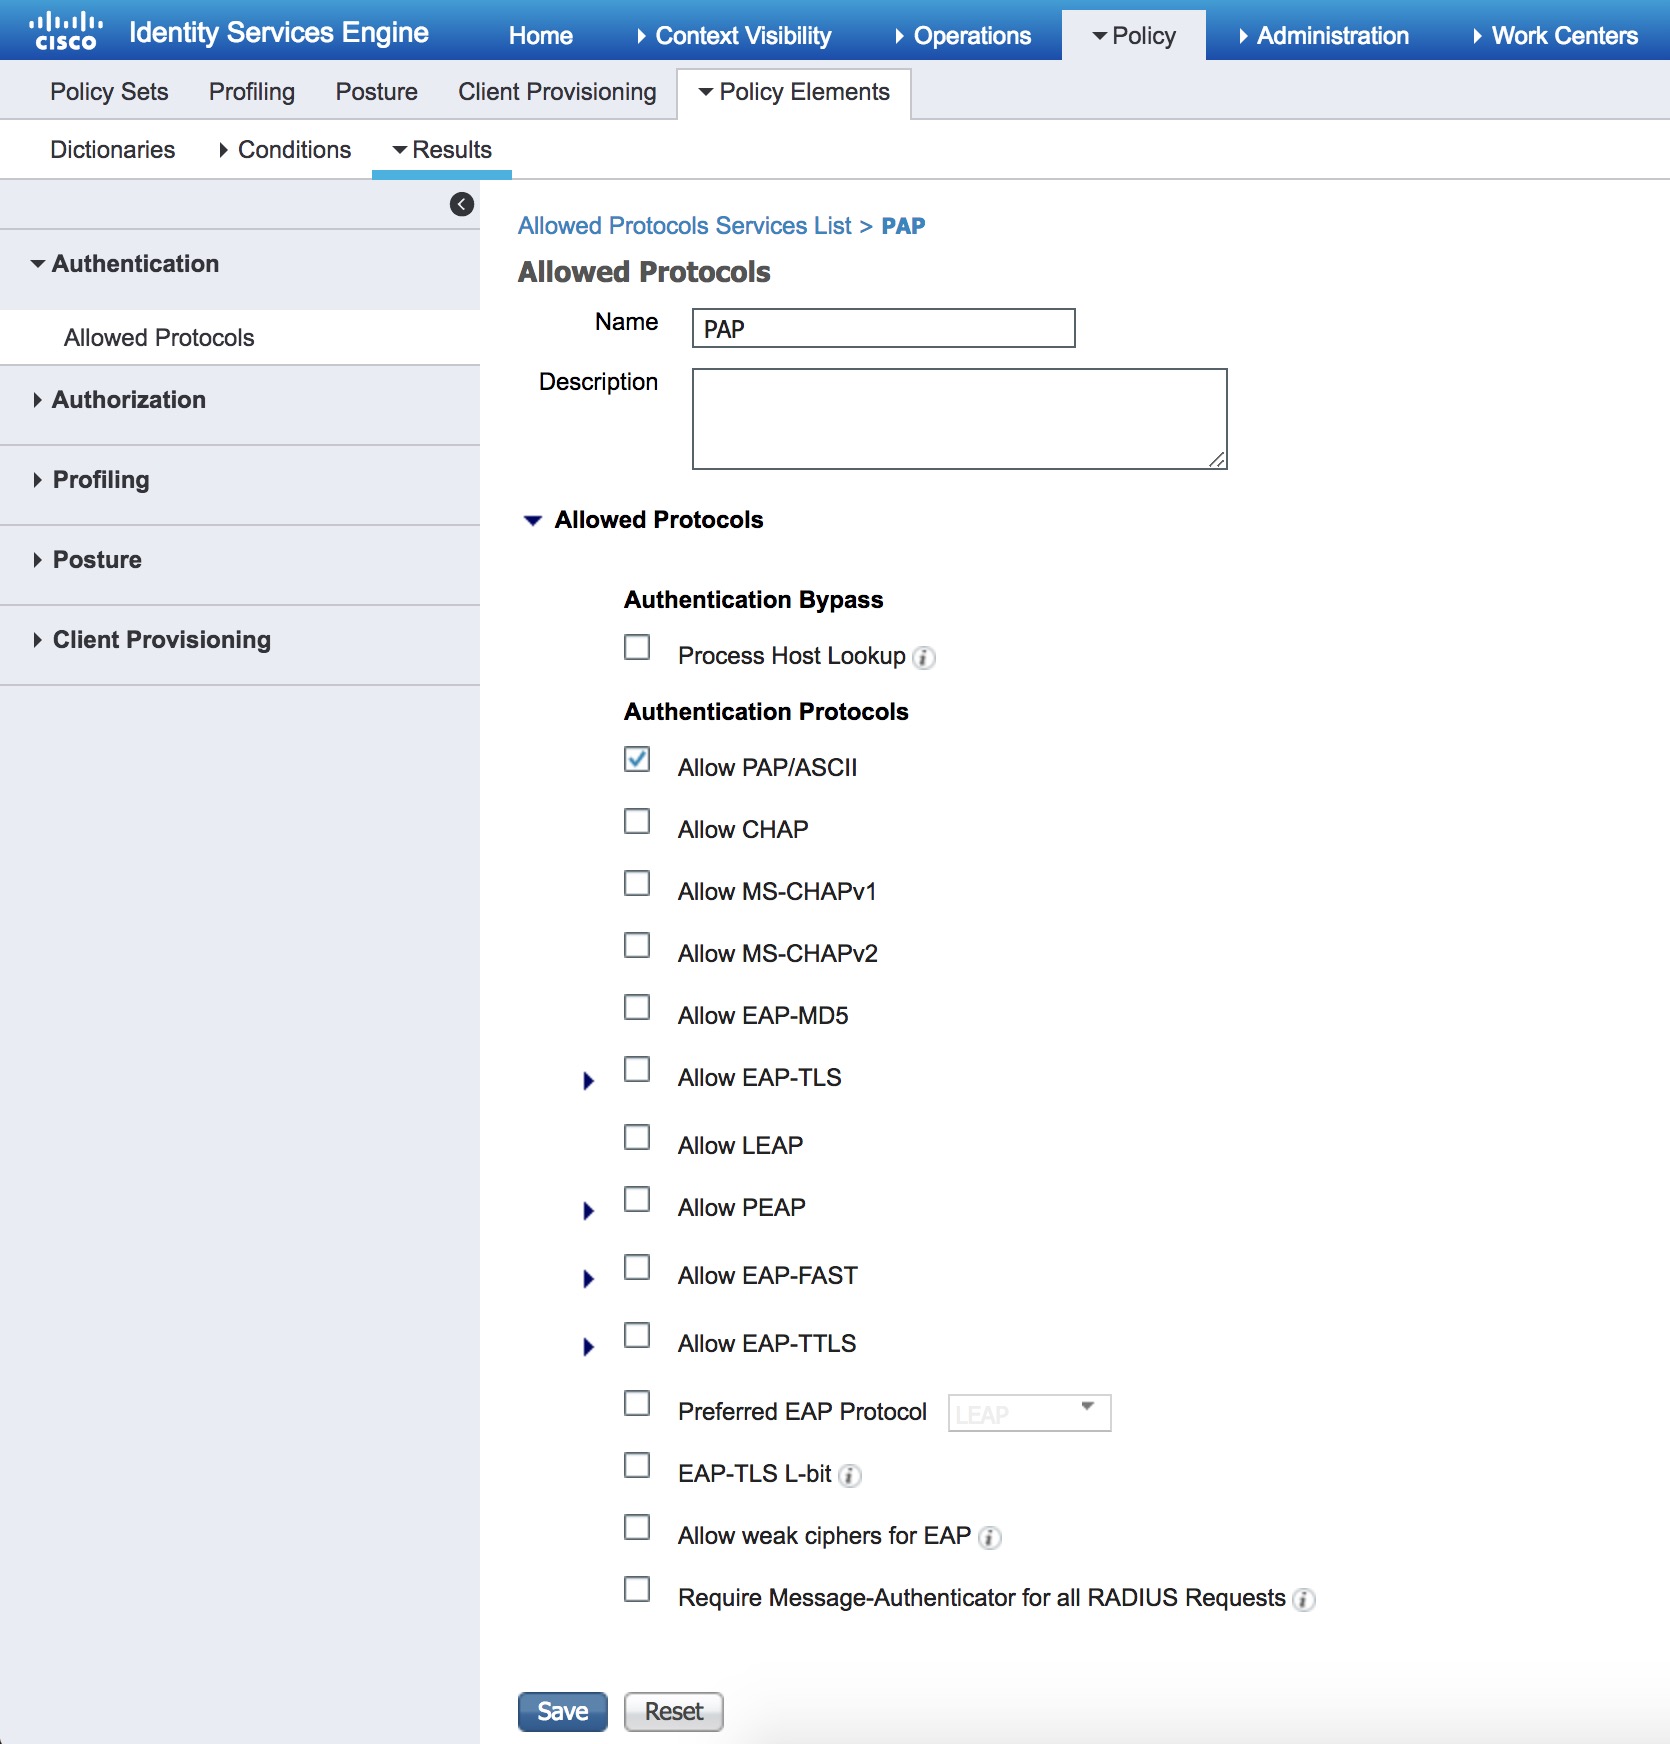
Under Policy -> Policy Elements -> Results -> Authorization -> Authorization Profiles you add a new authorization profile for the ACCESSS-ACCEPT message we’ll use later in our policy set.
I called mine DNAC_Super_Admin, but the important part is the Advanced Attributes Settings where you must select Cisco:cisco-av-pair=Role=SUPER-ADMIN-ROLE
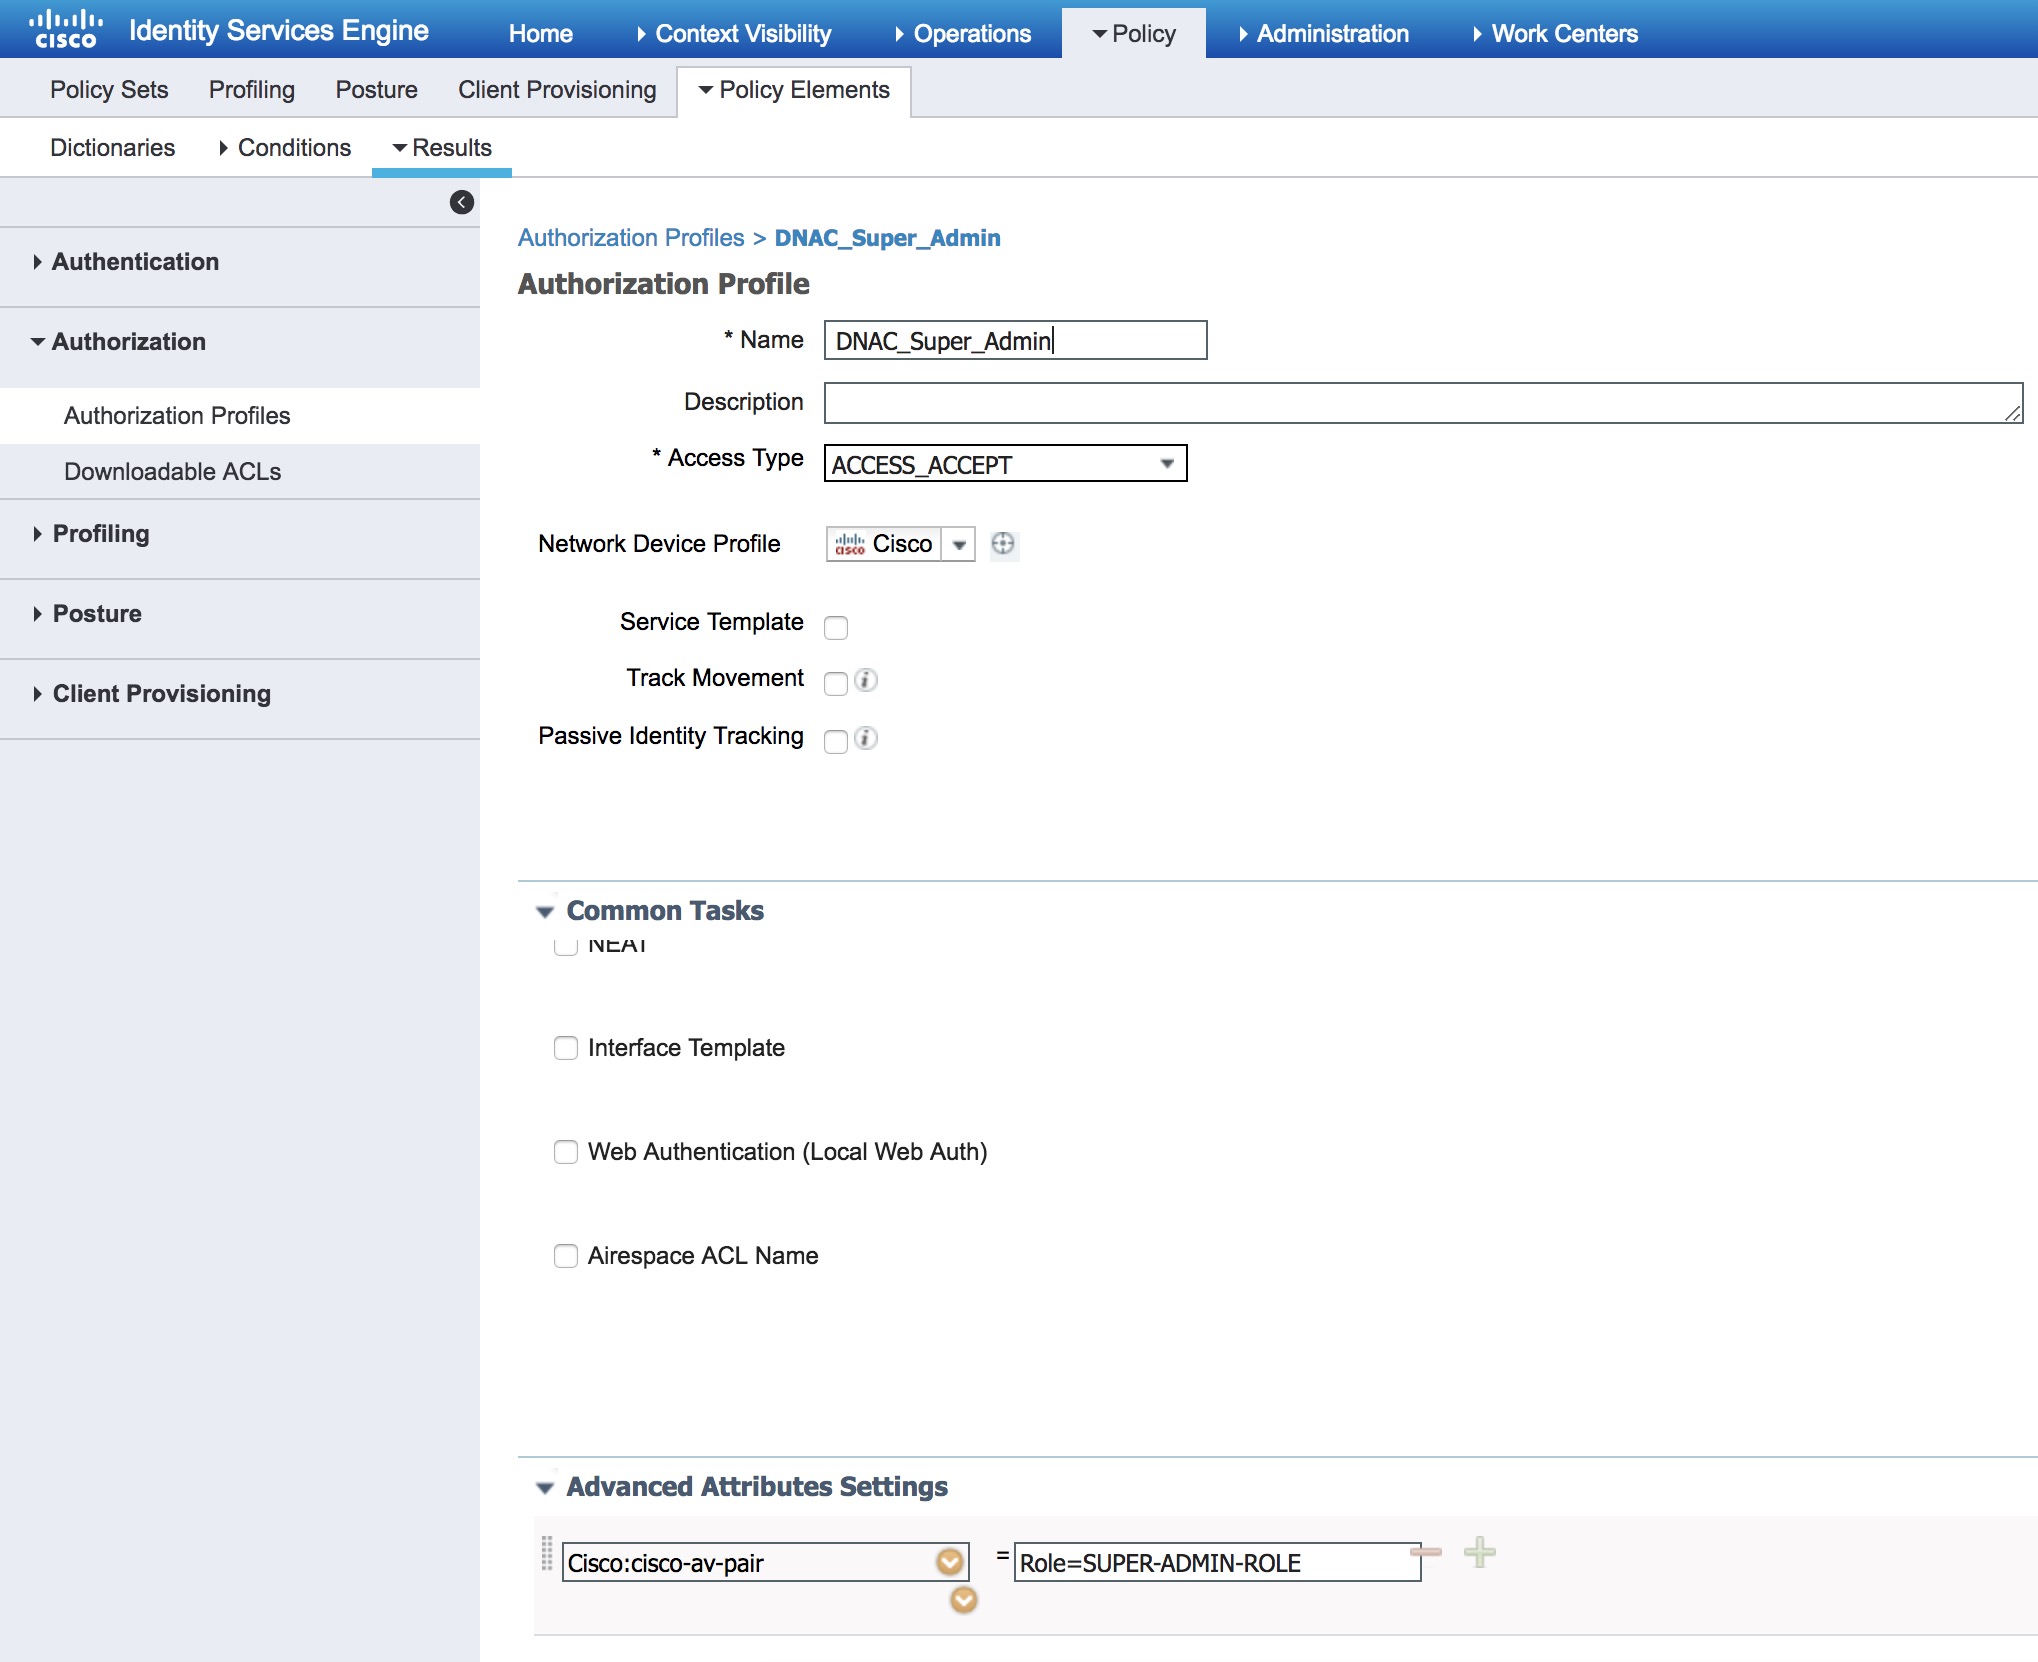
Attributes Details in the bottom should read:
Access Type = ACCESS_ACCEPT
cisco-av-pair = Role=SUPER-ADMIN-ROLE
Finally we should be able to create the policy set. Go to Policy -> Policy Sets and add a new policy for our DNAC-Admin policy:

Once created using the DNAC IP address as a condition, save it and modify it by clicking on the >Â sign to the far right of the policy.
Now we can put in the Identity Store AD under the Authentication Policy and add an Authorization Policy containing the DNAC-Admins group as a condition and our DNAC_Super_Admin profile: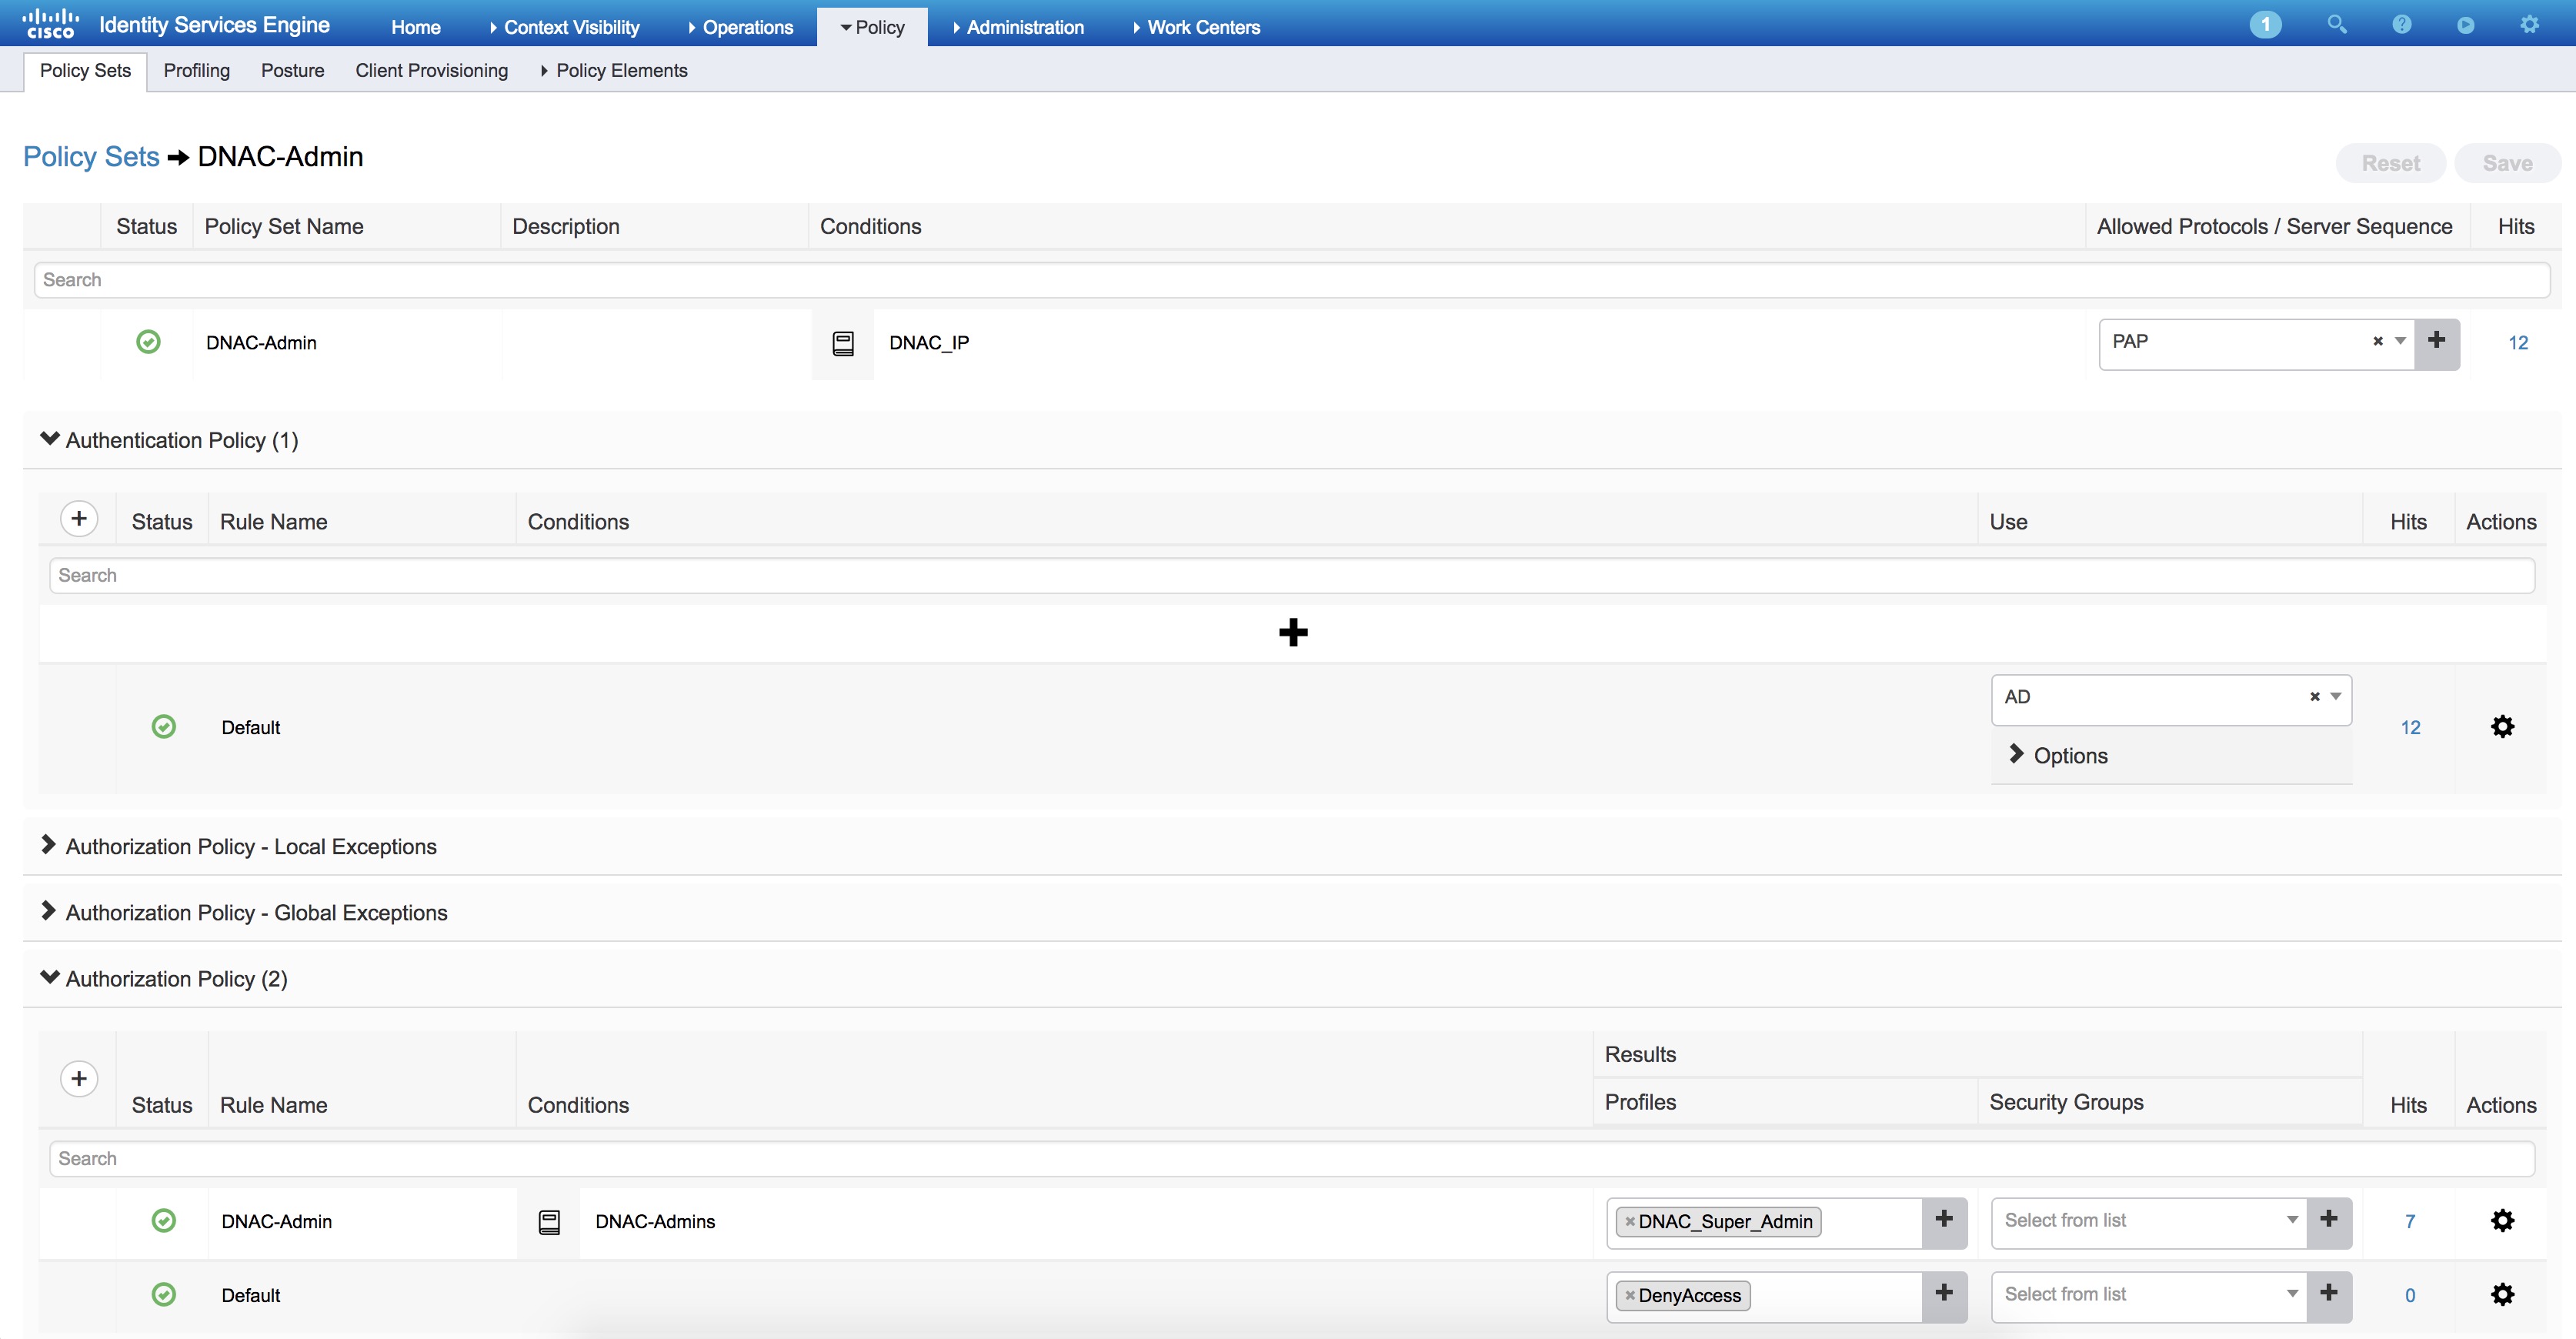
Hit save and you should be good to go.
Now in DNAC under Settings -> System Settings -> Users -> External Authentication you should see the external Users that have successfully logged on.
Â