DNAC Integration with ISE using a self-signed Certificate
NOTE! Using ISE 2.3p3 is not an option due to CSCvi94778
If you’re deploying a DNAC and you want to integrate with ISE, you might have read the following documents:
Perform Post-Installation Tasks
Cisco ISE Integration Limitations
I did and ended up with this error in DNAC when adding ISE:
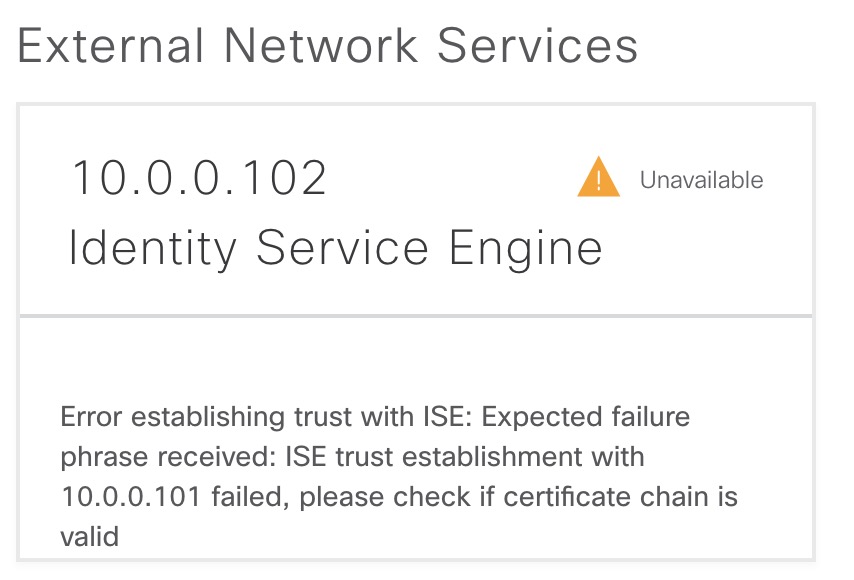
Clearly this is a certificate error. The thing is that Cisco mentions that SAN (Subject Alternate Name) is essential for the trust between DNAC and ISE. They state this:
The IP address or FQDN of both Cisco ISE and DNA Center should be present in either the Subject Name field or the Subject Alt Name field of the corresponding certificates.
So I decided to use DNS for my SAN and got the above error! A colleague of mine decided to go with IPs instead which worked! Here is how you do it.
Create a file named req.conf with the following content:
[ ca ]
default_ca = CA_default

[ req ]
prompt = no
distinguished_name = req_distinguished_name
x509_extensions = v3_ca

[req_distinguished_name]
C = DK
O = MyCompany
CN = dnac.sda.domain.lab

[alternate_names]
IP.1 = 10.0.0.101
IP.2 = 10.0.0.201
DNS.1 = dnac.sda.domain.lab

[v3_ca]
basicConstraints = CA:TRUE
subjectAltName = @alternate_names
keyUsage = nonRepudiation, digitalSignature, keyEncipherment, dataEncipherment

[CA_default]
copy_extensions = copy
This serves as a configuration file for openssl. Specify both the real IP of the DNAC(s) and the VIP.
Next, use openssl to generate a self-signed certificate like this:
openssl req -x509 -newkey rsa:2048 -keyout key.pem -out cert.pem -days 1825 -config req.conf
The only thing needed is to upload the new certificate to DNAC. Browse to Settings -> Certificate and click Replace Certificate.
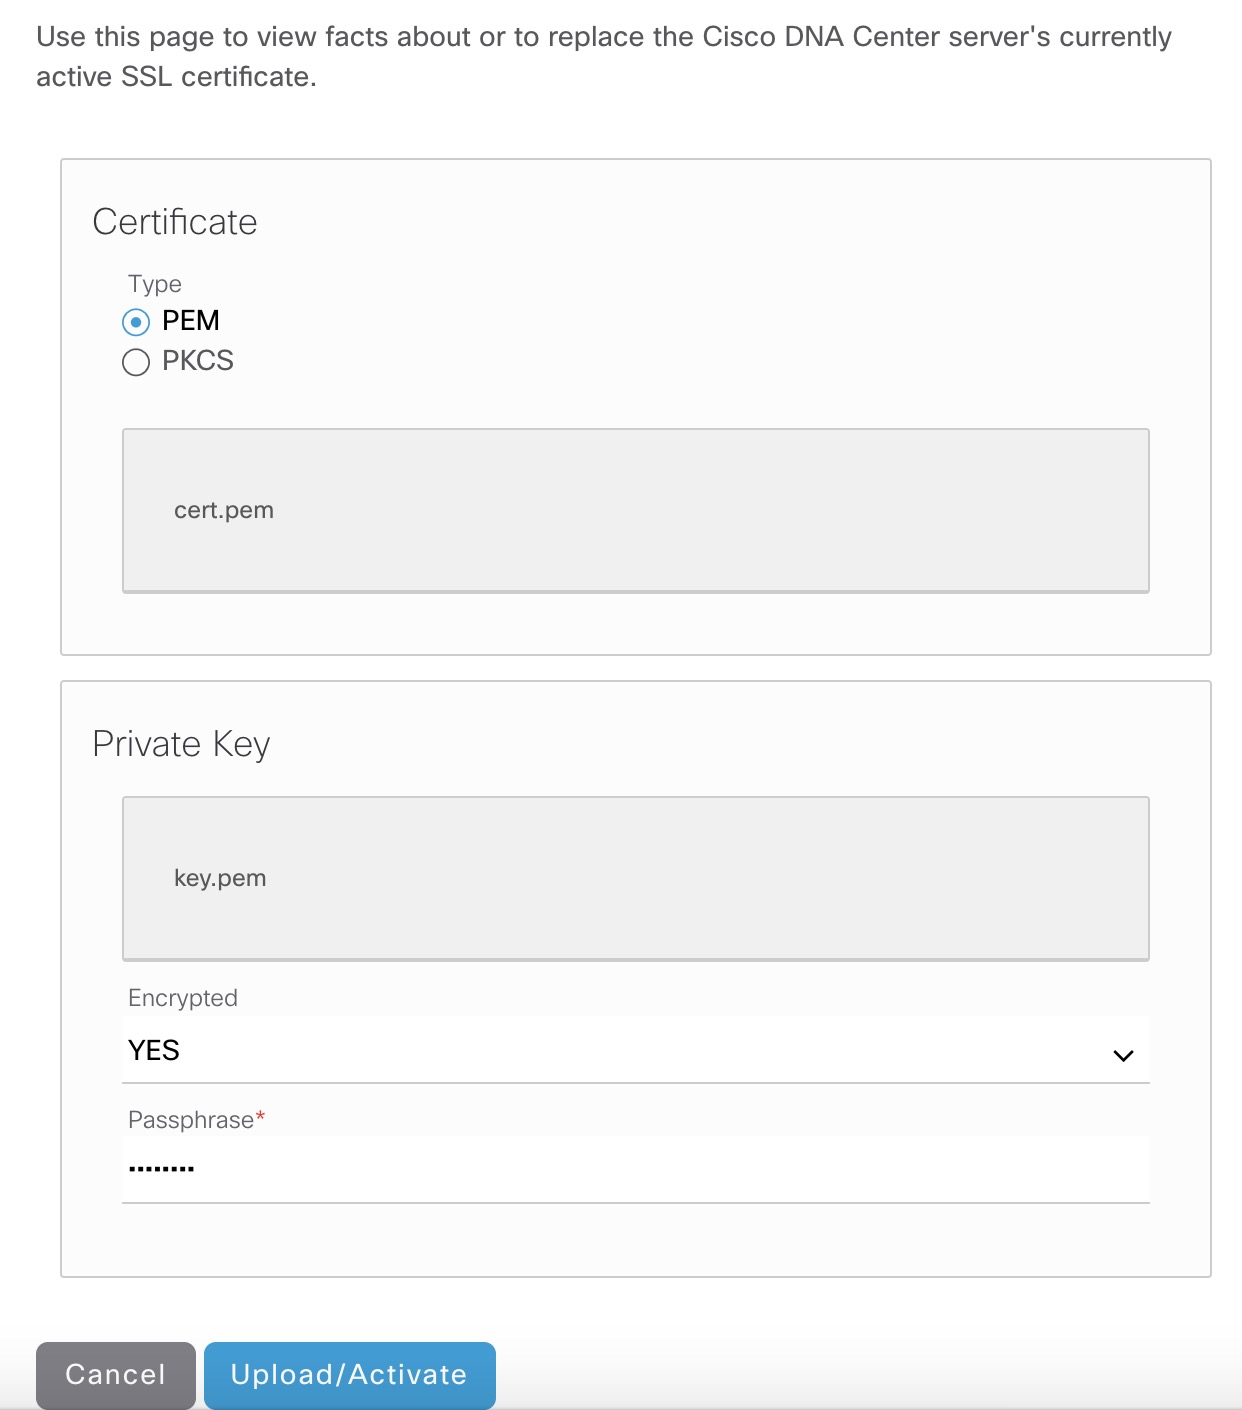
Click Upload/Activate and wait for 5-10 minutes. Refresh the page and you should be prompte to accept the newly (untrusted) certificate in your browser.
Now you can add ISE under Settings ->� Authentication and Policy Servers
If it works, you should see this:

Now you must approve DNAC in ISE. Go to your ISE Web UI under Administration -> pxGrid Services
Here you’ll see this:

Select Total Pending Approval and select Approve all (click OK to confirm).
Now back to DNAC and you’ll see this:

All done. Success!